
Application hosting
Deploy Node.js applications with HostRight Control Panel
Create, configure and run production Node.js applications on HostRight with the managed Node.js application interface.
HostRight lets you run Node.js applications without managing a full server. The HostRight Control Panel control panel provides the runtime selector, application root, domain mapping, startup file, environment variables and application controls in one place.
This guide uses a small application called myapp. Replace the example domain, account name and paths with your own values.
Before you start
Prepare these items:
- A HostRight hosting account and a domain pointed to it.
- Your application source code and a
package.jsonfile. - The Node.js version required by your project.
- Database credentials if the application stores data.
- Redis credentials or a Redis socket path if the application uses caching, queues or sessions.
Keep application code outside the public web directory when possible. For example, use apps/myapp as the application root and keep only files that must be public in the domain's public directory.
Open Setup Node.js App
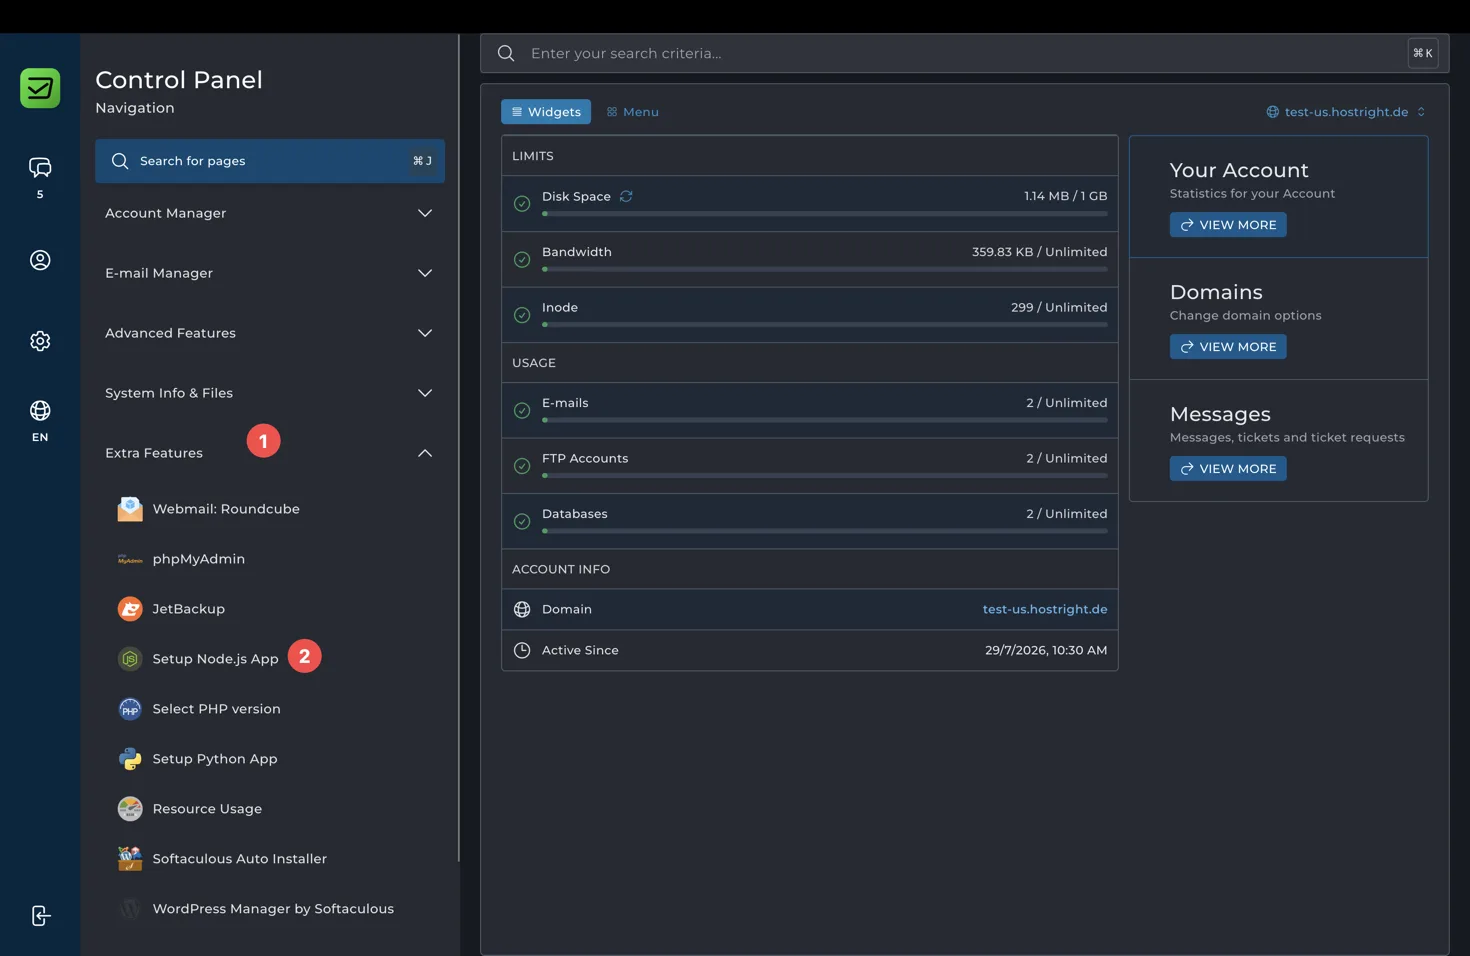
In HostRight Control Panel, open Extra Features, then select Setup Node.js App.
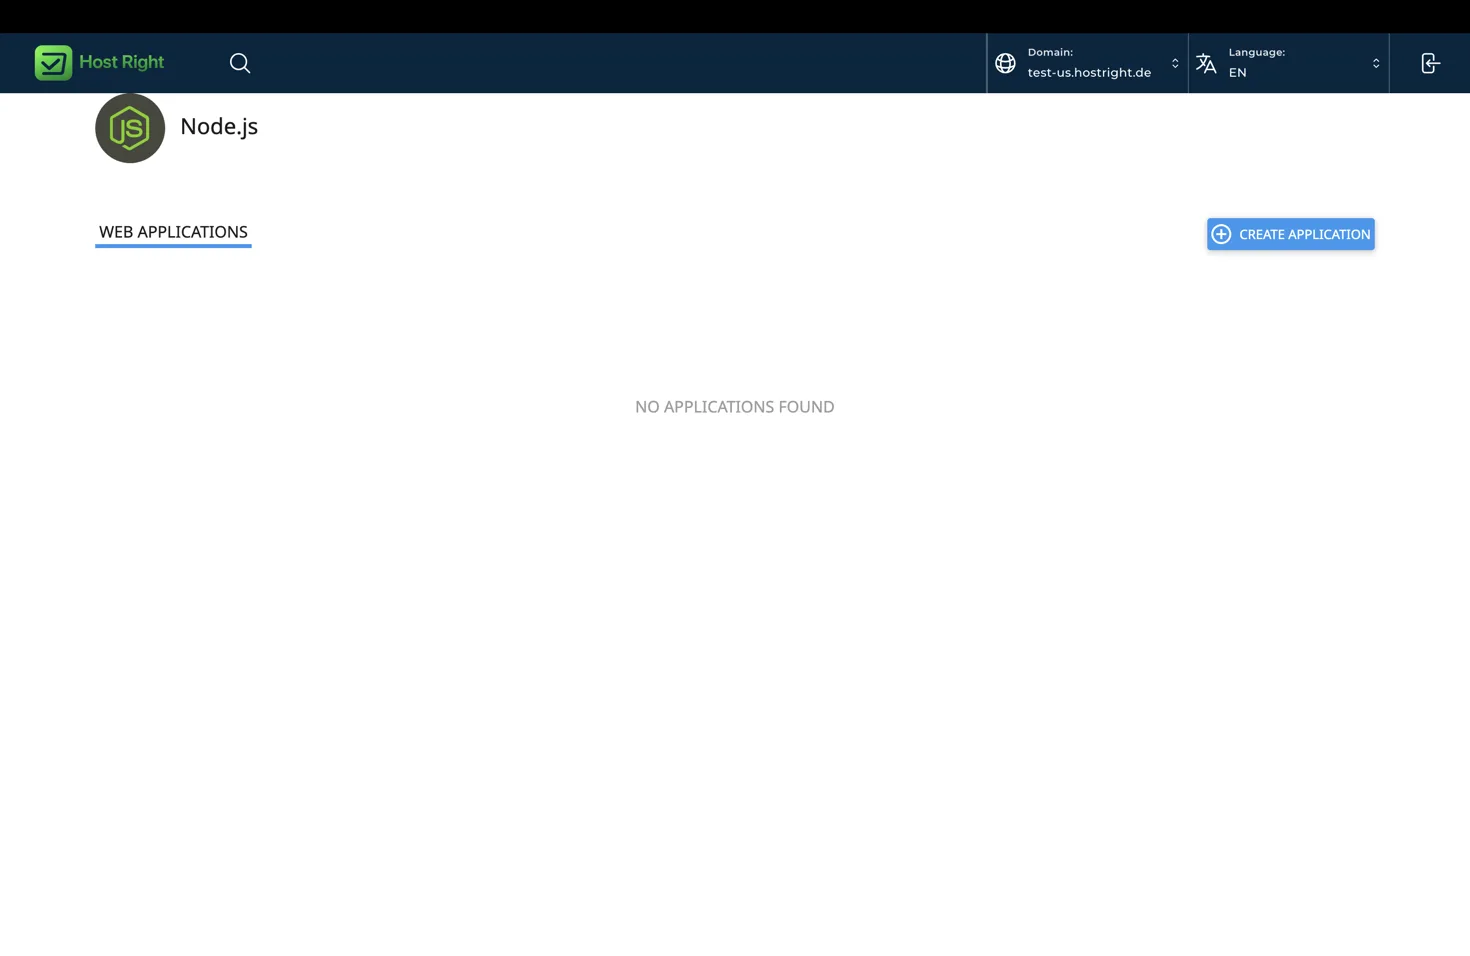
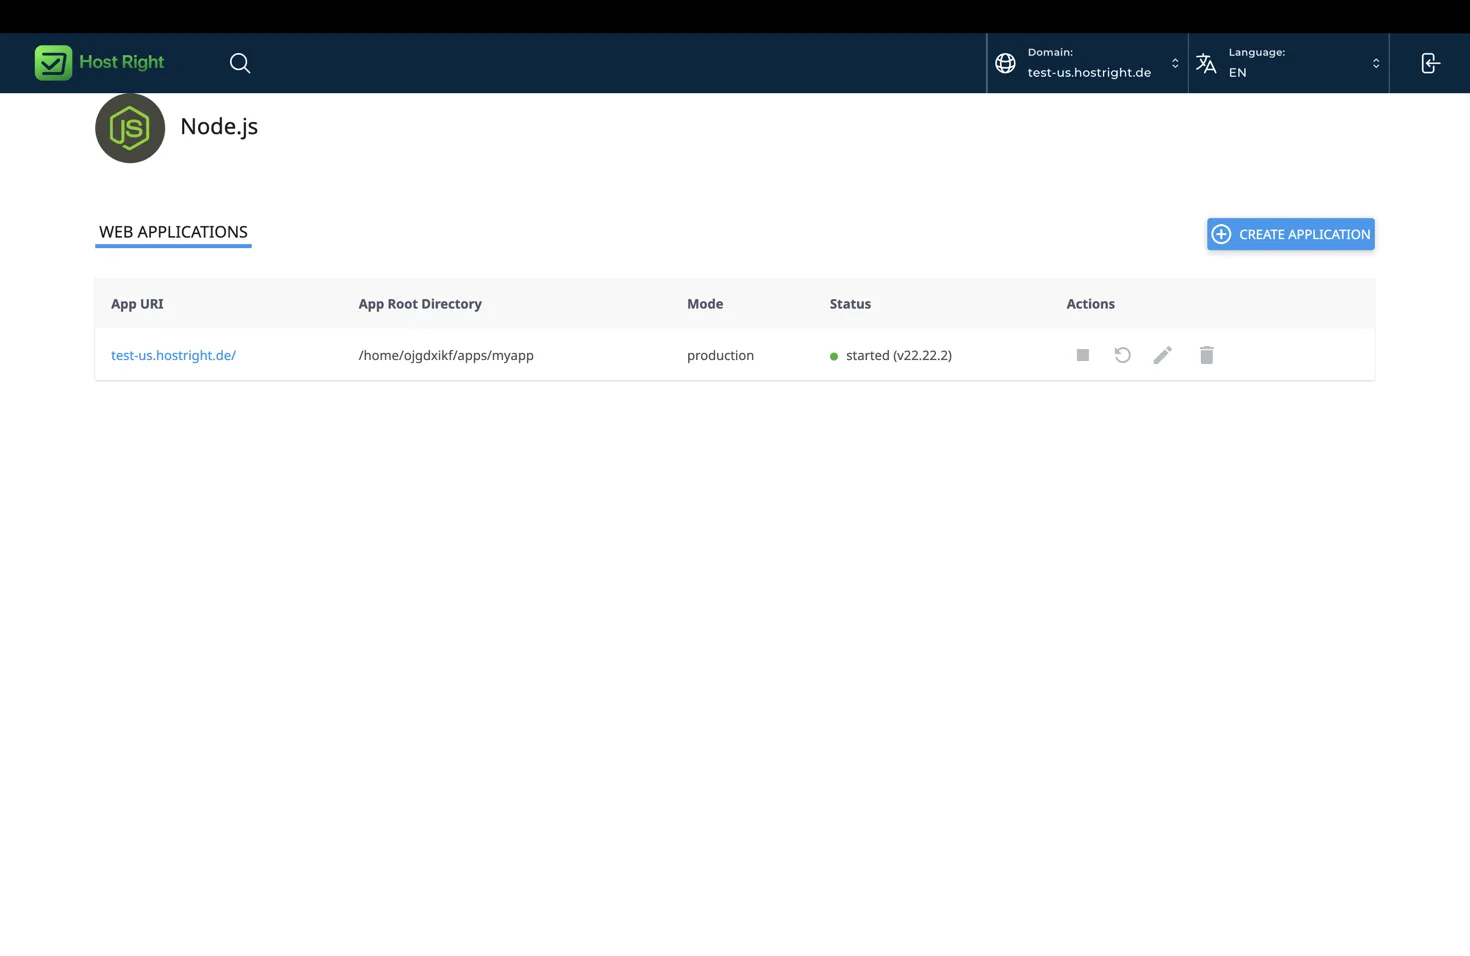
The first screen lists the Node.js applications on the selected domain. If you have not created one yet, the list is empty. Select Create Application to begin.
Create the application
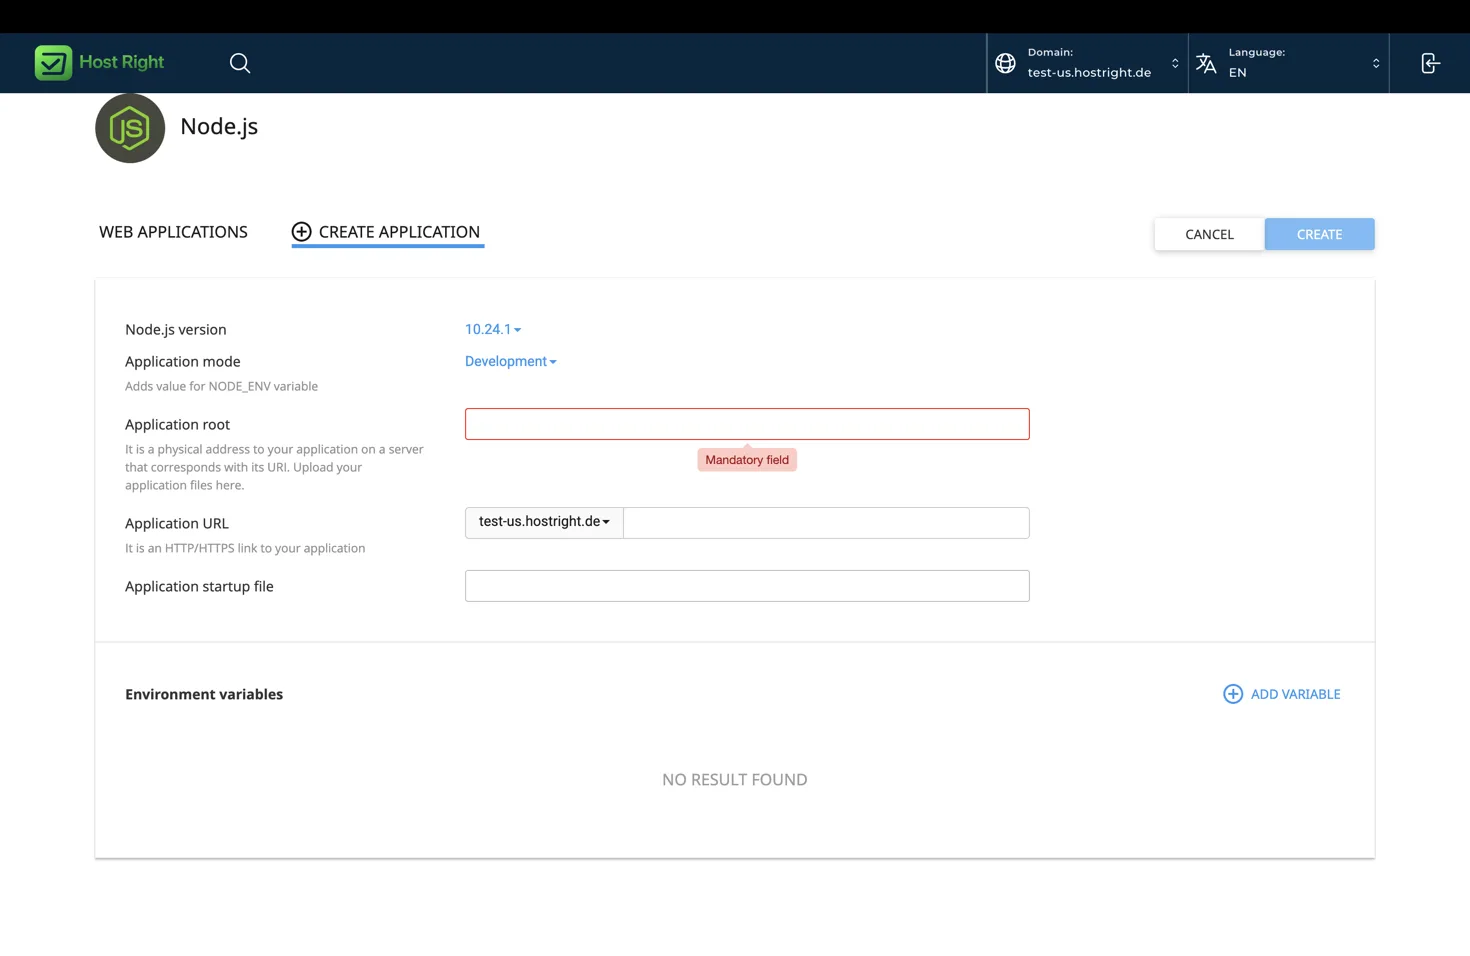
The form asks for the runtime and the location where HostRight Control Panel will start the application.
Choose a Node.js version
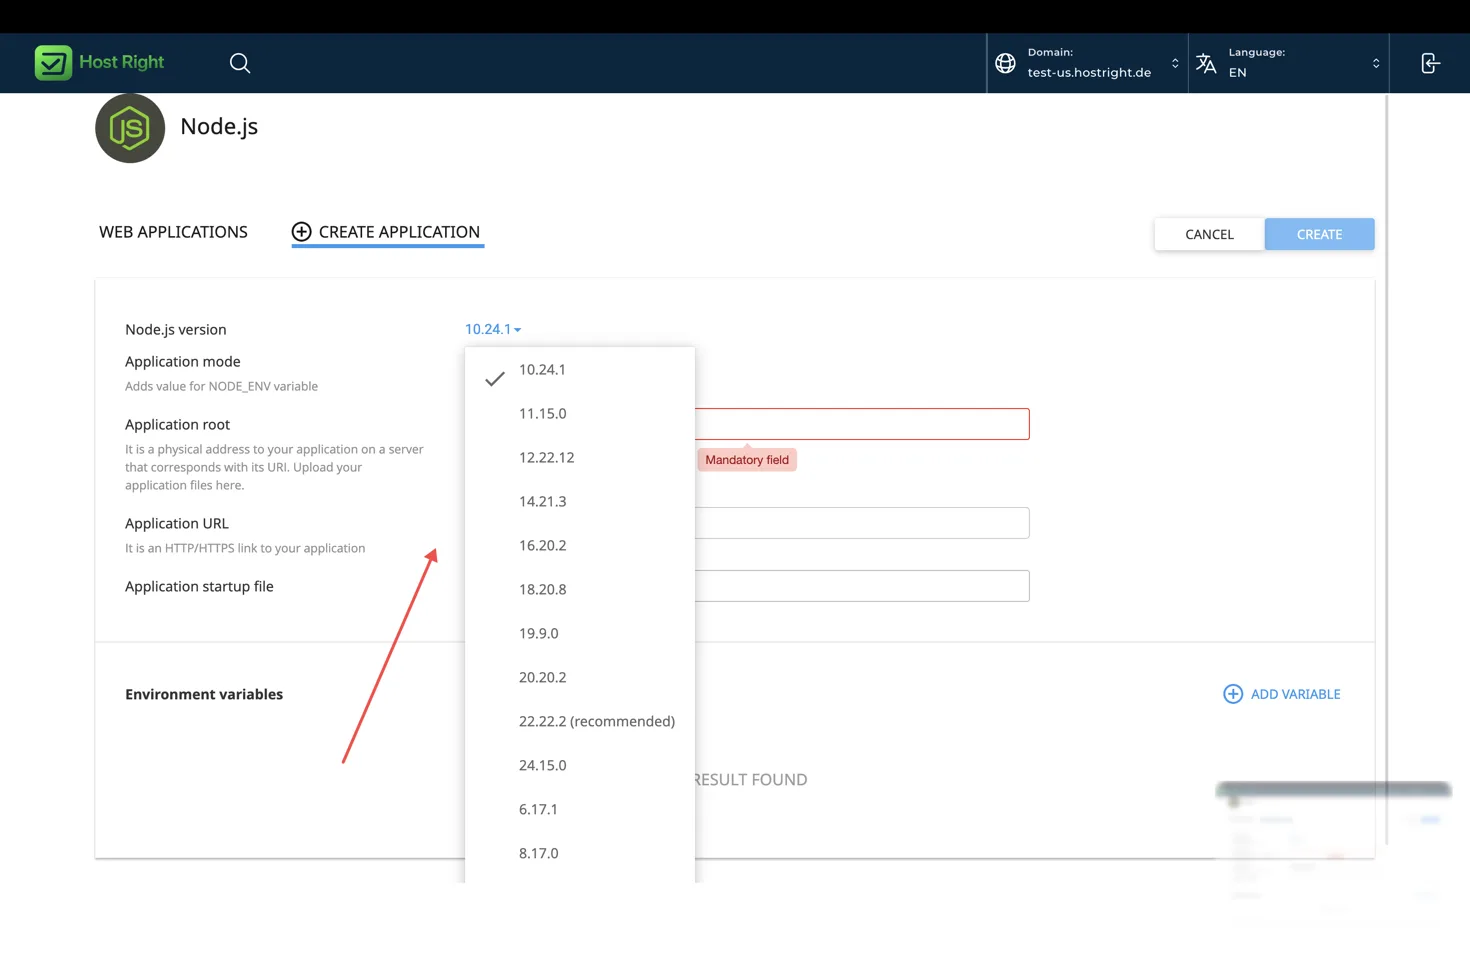
Use a supported version compatible with your dependencies. The panel marks its recommended version, which is the sensible starting point for a new application. Pin the major version that your project has tested instead of changing versions during a deployment.
Select production mode
Choose Production for a live site. Development mode is useful while testing, but production mode sets the application environment appropriately and avoids development defaults.
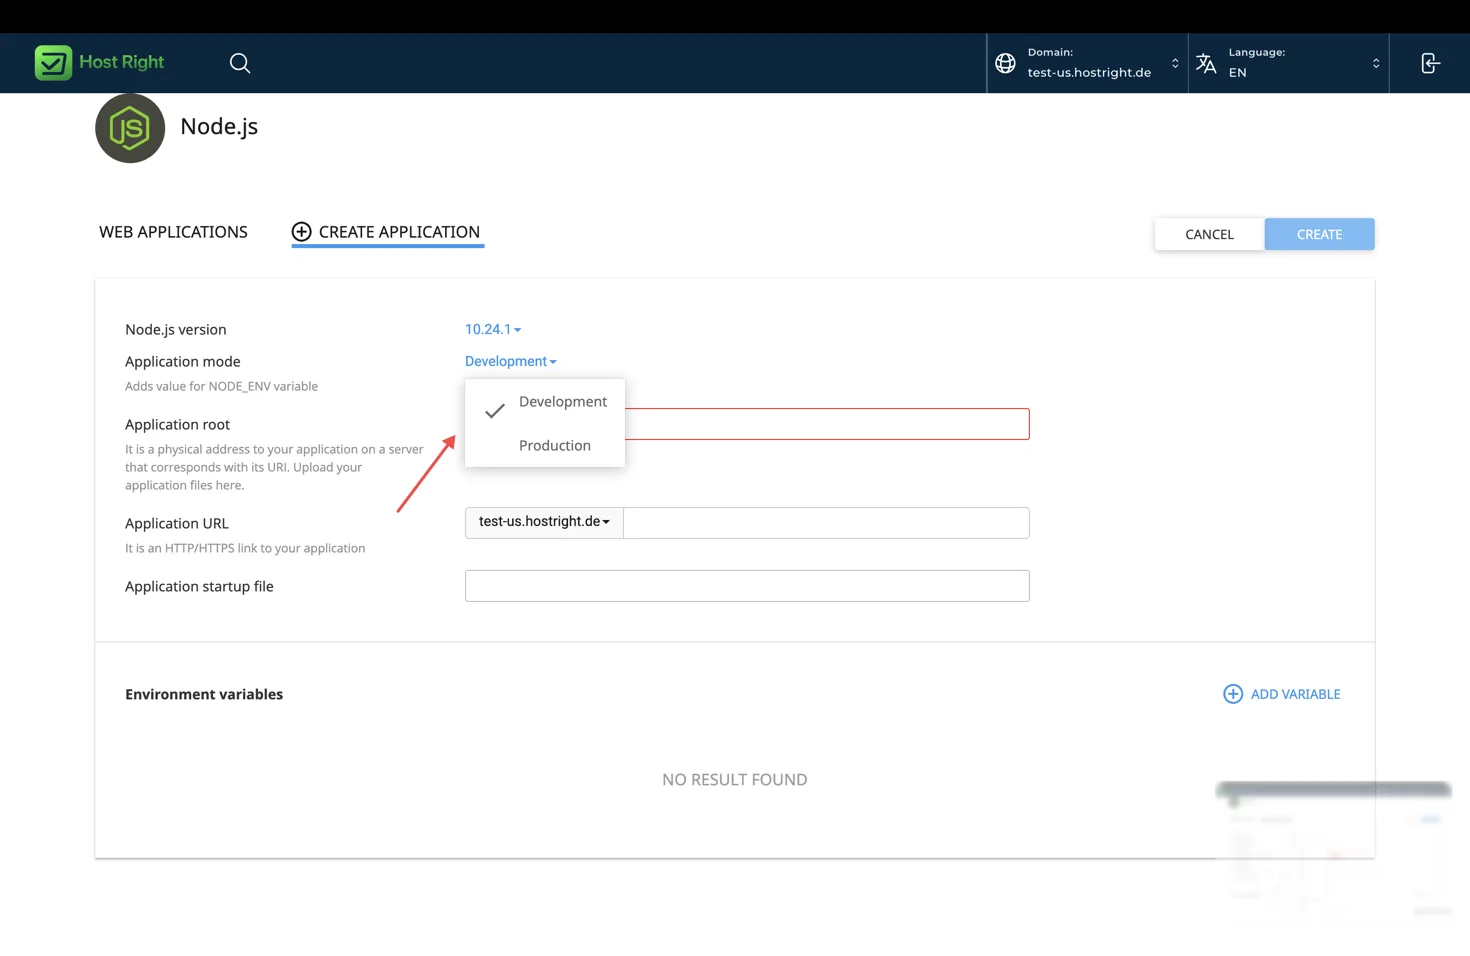
Set the root, URL and startup file
Use values similar to these:
| Field | Example | Purpose |
|---|---|---|
| Node.js version | Recommended supported version | Runtime used by the application |
| Application mode | Production | Sets the live application mode |
| Application root | apps/myapp |
Private directory containing the application |
| Application URL | Your domain or a path | Public address for the application |
| Startup file | app.js |
The file that starts the application |
The application root is relative to your hosting account home directory. Do not put a private .env file, source repository or dependency tree in public_html unless the project specifically requires it.
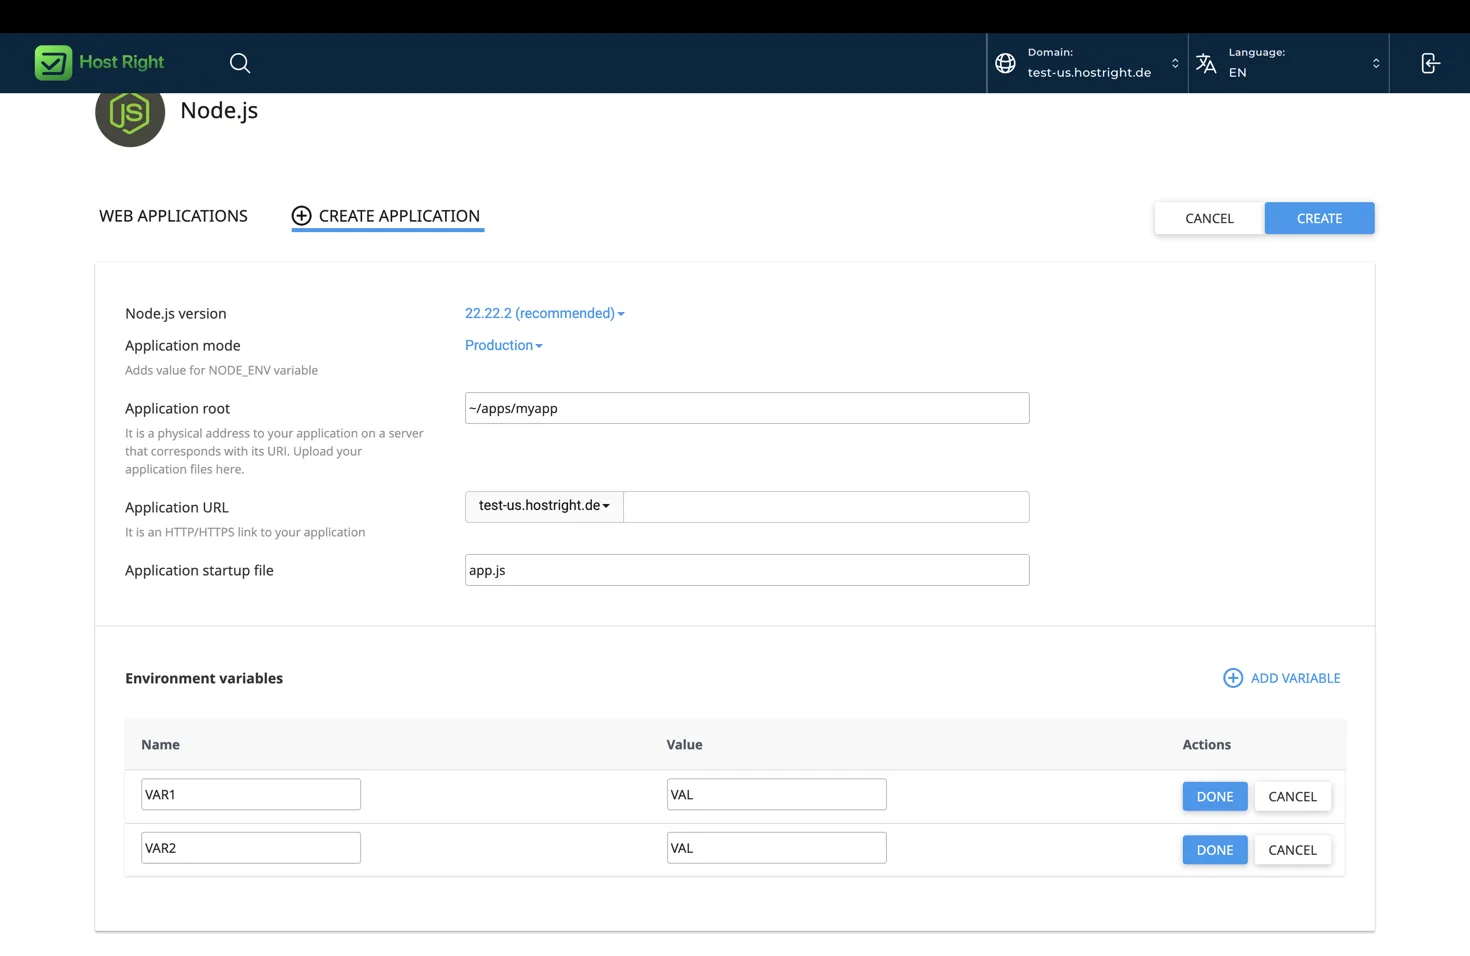
Add environment variables in the form rather than committing secrets to Git. Typical variables include NODE_ENV=production, database connection values, a session secret and a Redis socket or URL.
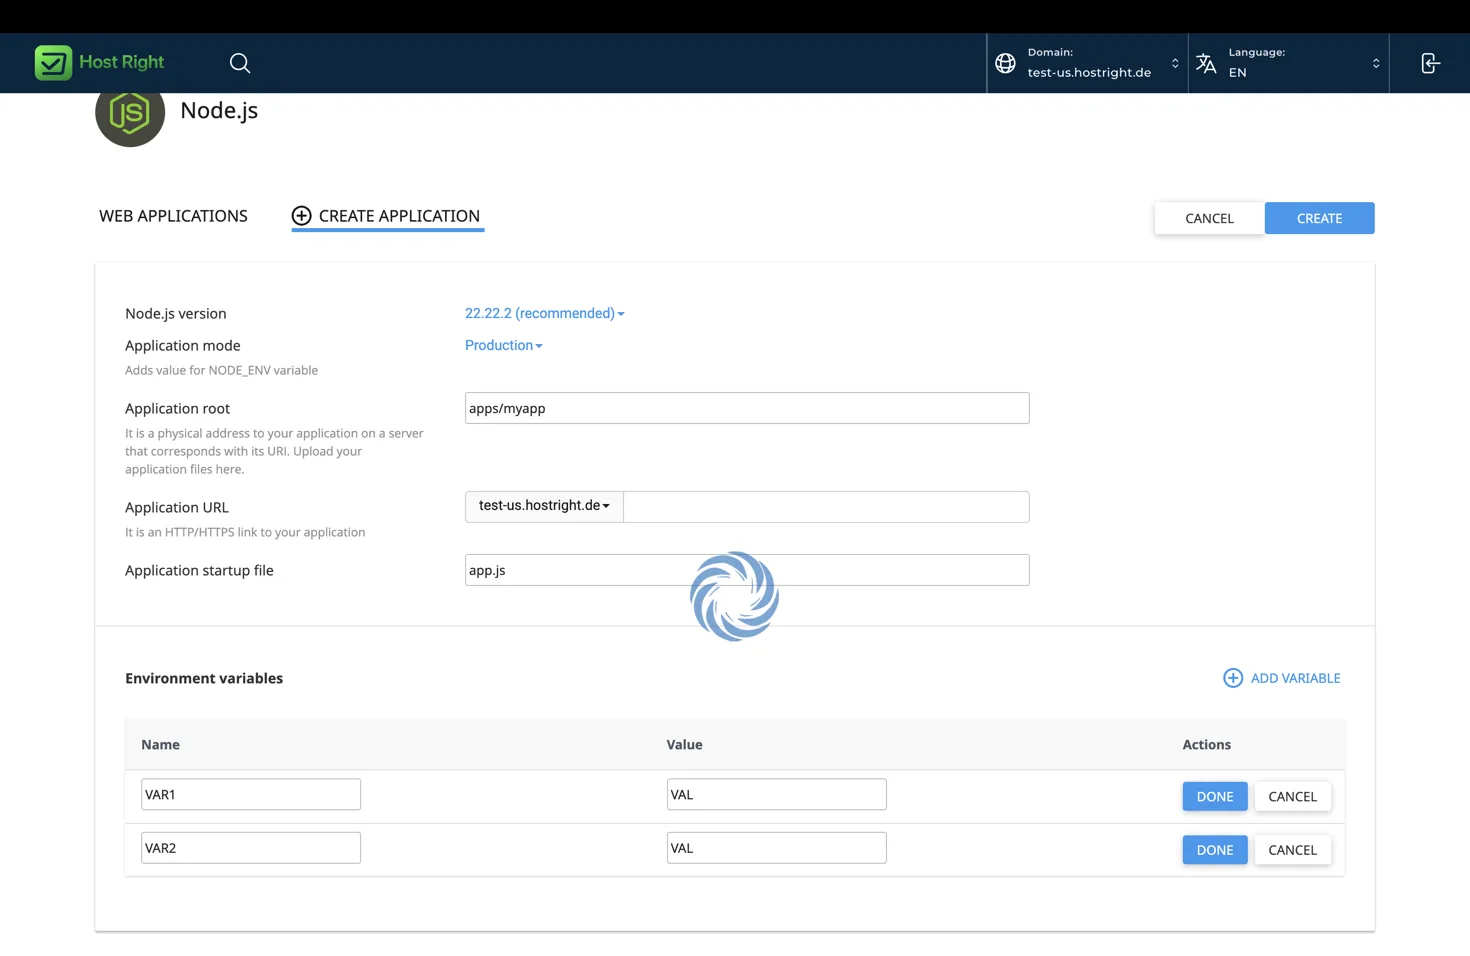
Select Create. The panel may briefly show a loading state while it provisions the application.
Install dependencies and start the app
After creation, open the application details. The page shows the application status, stop and restart controls, the startup configuration and a command for entering the application's managed environment.
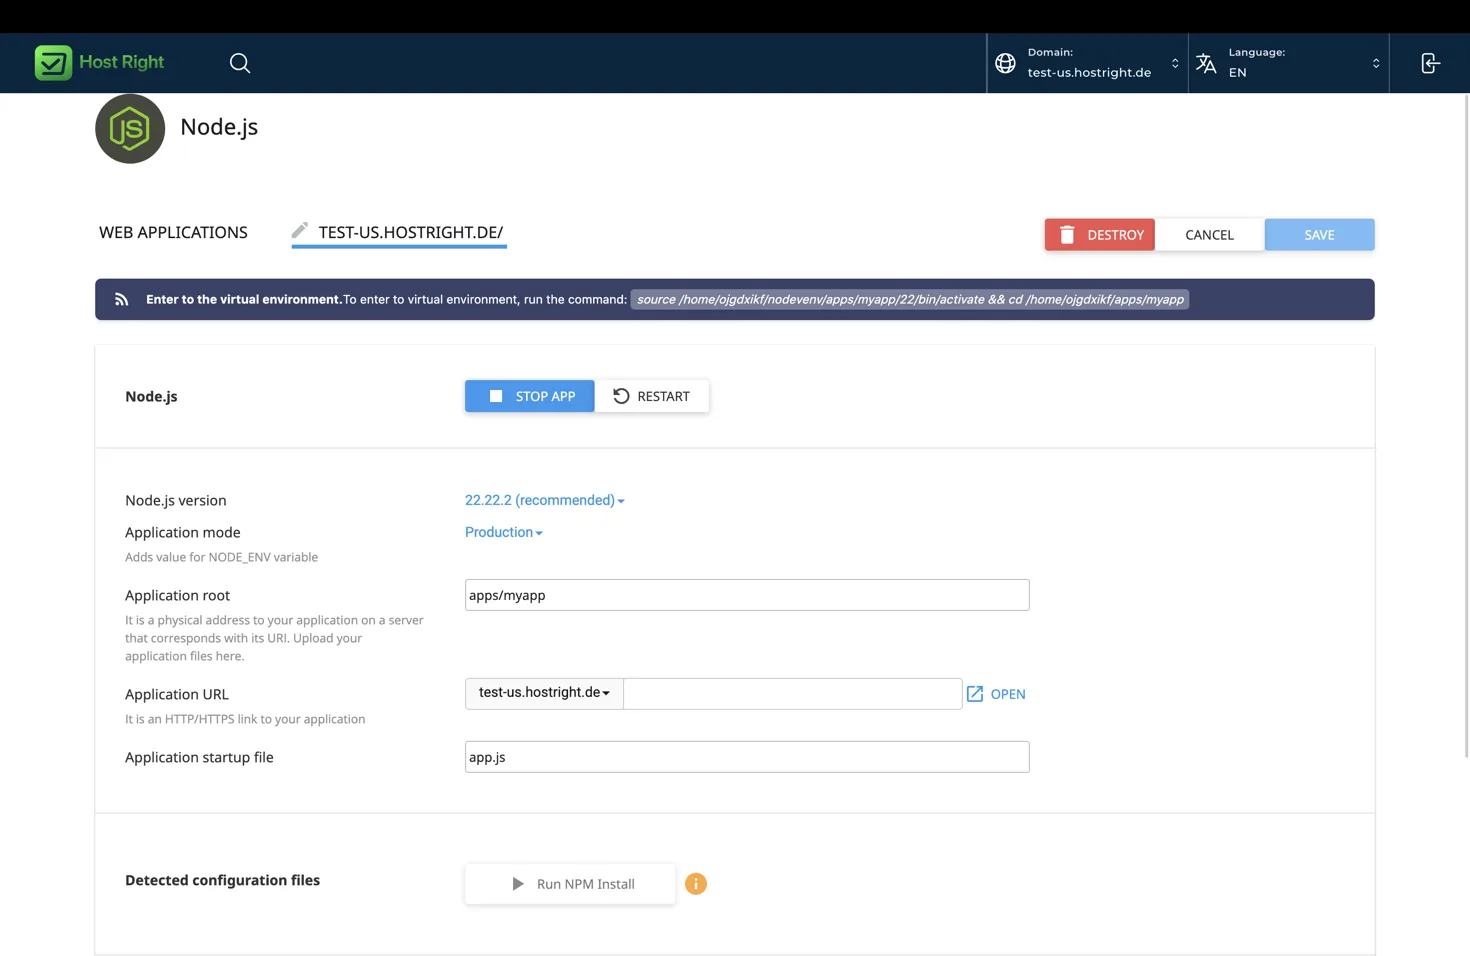
Use SSH when you need repeatable deployments. The panel supplies the exact environment command for your account. It has the same shape as:
source /home/ACCOUNT_USERNAME/nodeenv/apps/myapp/VERSION/bin/activate
cd /home/ACCOUNT_USERNAME/apps/myapp
npm install
You can also use the panel's Run NPM Install action when it is available. Prefer npm ci for a deployment when the repository contains a committed package-lock.json:
npm ci --omit=dev
Run your migration, build or asset commands in the same application directory. Then use Restart in the panel so the managed application reloads the new code and variables.
Minimal startup example
For a plain Node.js HTTP app, app.js can look like this:
const http = require('node:http');

const port = Number(process.env.PORT || 3000);

const server = http.createServer((request, response) => {
  response.writeHead(200, { 'Content-Type': 'text/plain' });
  response.end('Node.js is running on HostRight.');
});

server.listen(port, '127.0.0.1', () => {
  console.log(`Listening on ${port}`);
});
For Express, the startup file should import the Express app and call listen with process.env.PORT. The control panel maps the public domain to the managed application, so do not expose a separate public port in the URL.
Deploy with Git, SSH, SFTP or FTP
Git over SSH is the best fit for repeatable deployments. Clone or pull the repository inside apps/myapp, install dependencies, run the build, and restart the application.
cd ~/apps
git clone YOUR_REPOSITORY_URL myapp
cd myapp
npm ci --omit=dev
npm run build
For a manual upload, use SFTP over SSH whenever possible. FTP is available for compatibility, but it does not provide the same transport security. Upload the project to the application root, exclude local node_modules when practical, install dependencies on the server, and restart the app.
- Connect with SSH
- Transfer files with SFTP
- Use FTP
- Git deployments can be performed through the SSH workflow described above.
SSL, databases and Redis
Point DNS to HostRight, wait for the domain to resolve, and issue the domain certificate from the hosting control panel before testing HTTPS. Use the existing SSL guide for the full certificate flow.
Create the database from the database tools, grant the application user access, and place the connection values in HostRight Control Panel environment variables. Do not hard-code a password in the repository.
Redis is useful for sessions, page fragments, rate limits, queues and temporary data. Create or enable Redis from the Redis tool, then use the socket or connection value shown there. Store it as an environment variable and configure the Node.js Redis client to read it. The Redis guide covers the panel-specific setup.
Manage the application
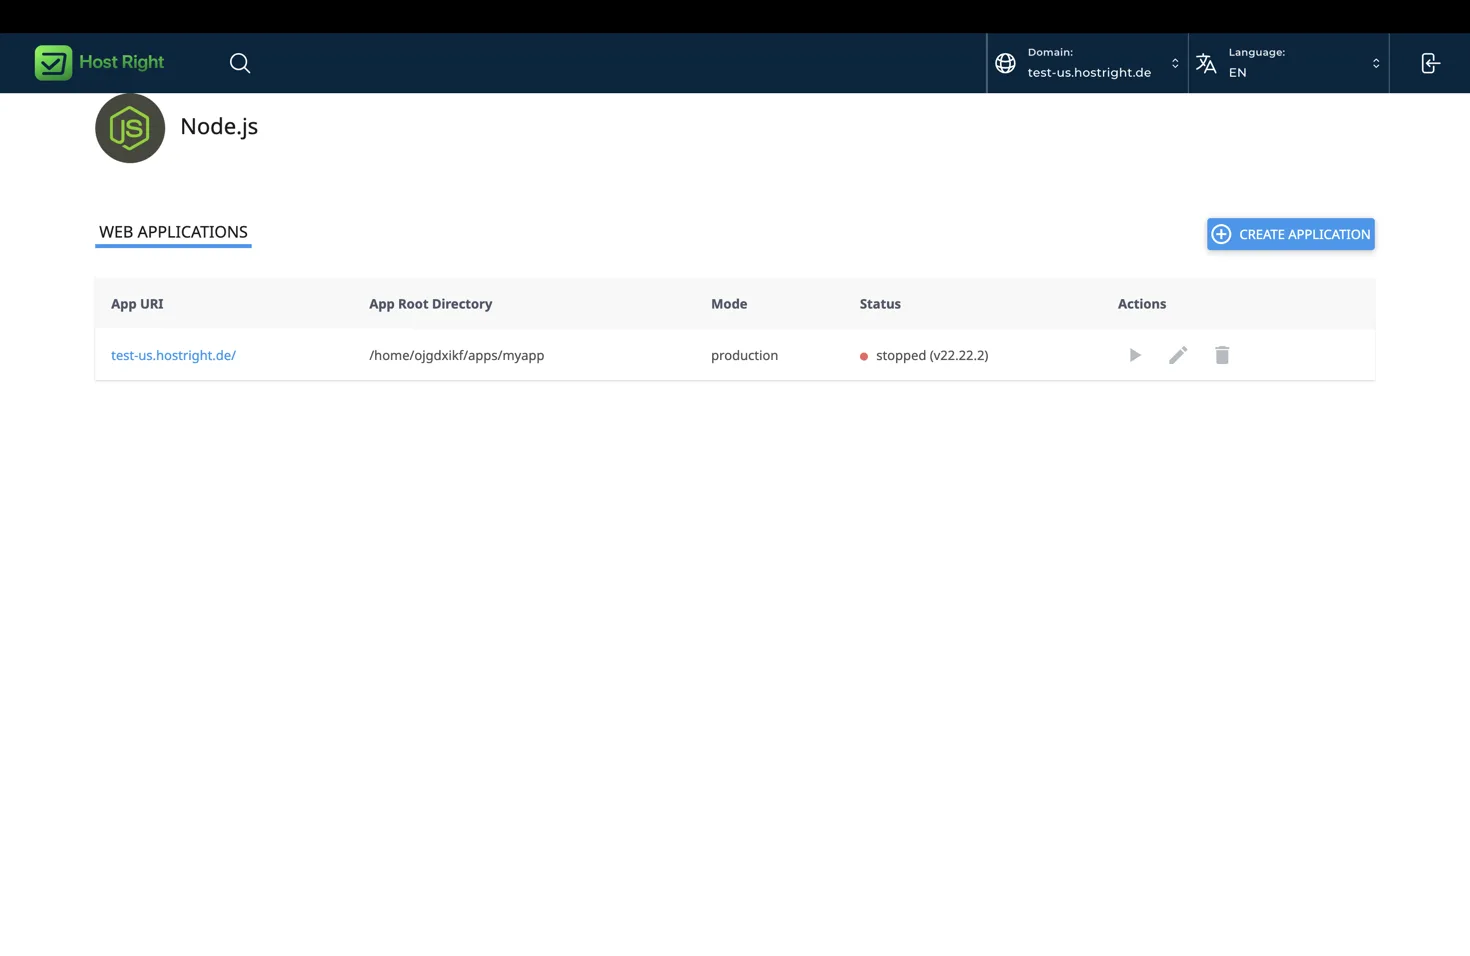
The application list shows the public URL, application root, mode and current status. A green status means the application is started. A stopped application can be started again from its row. Use restart after changing code, dependencies or environment variables.
Troubleshooting
The application does not start: confirm the startup filename, application root and Node.js version. Run the startup file manually inside the managed environment to reveal missing modules or syntax errors.
The site returns an application error: run npm ci, check the environment variables and restart the application. Confirm that the app listens on process.env.PORT.
Static files are missing: check the framework's production build command and make sure its public or static directory is included in the deployment. For Express, expose the intended directory with express.static.
A database connection fails: verify the database host, name, user, password and port. Confirm that the database user has permissions and that the values are available to the managed application.
A Redis feature fails: verify the Redis socket or URL and selected database number. Check that the Node.js Redis library is using the same connection format supplied by HostRight.