
Application hosting
Wallabag hosting
A starting guide for using Wallabag with HostRight.
Wallabag on HostRight
Wallabag gives you a private place to save and read articles. This guide will cover the first steps for getting started.
Access Softaculous and search
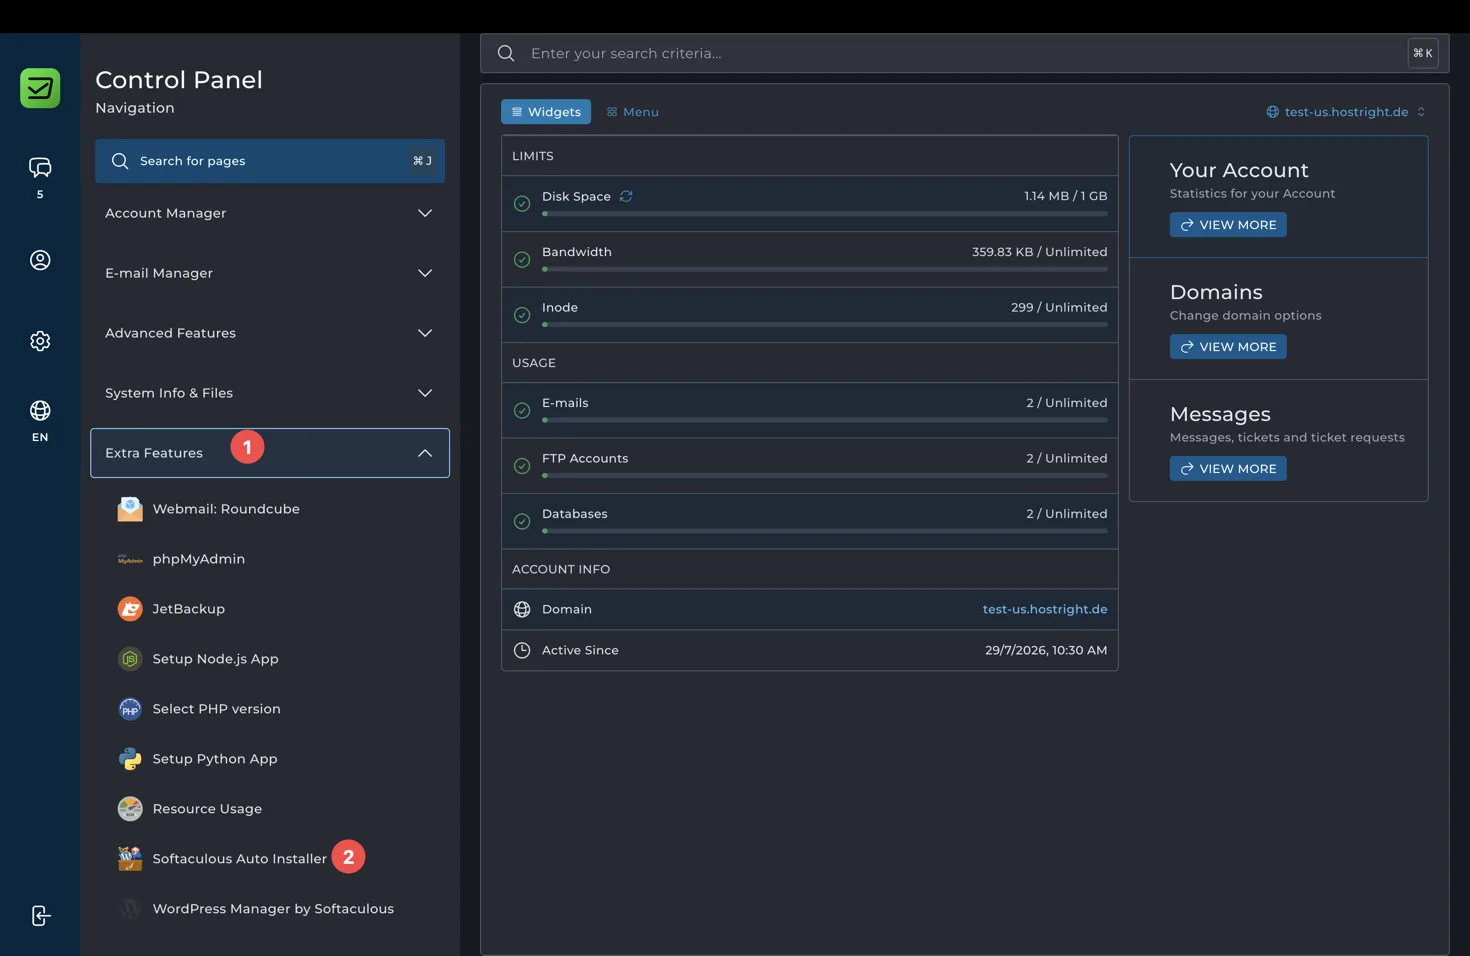
Open Extra Features in the Control Panel and select Softaculous Auto Installer.
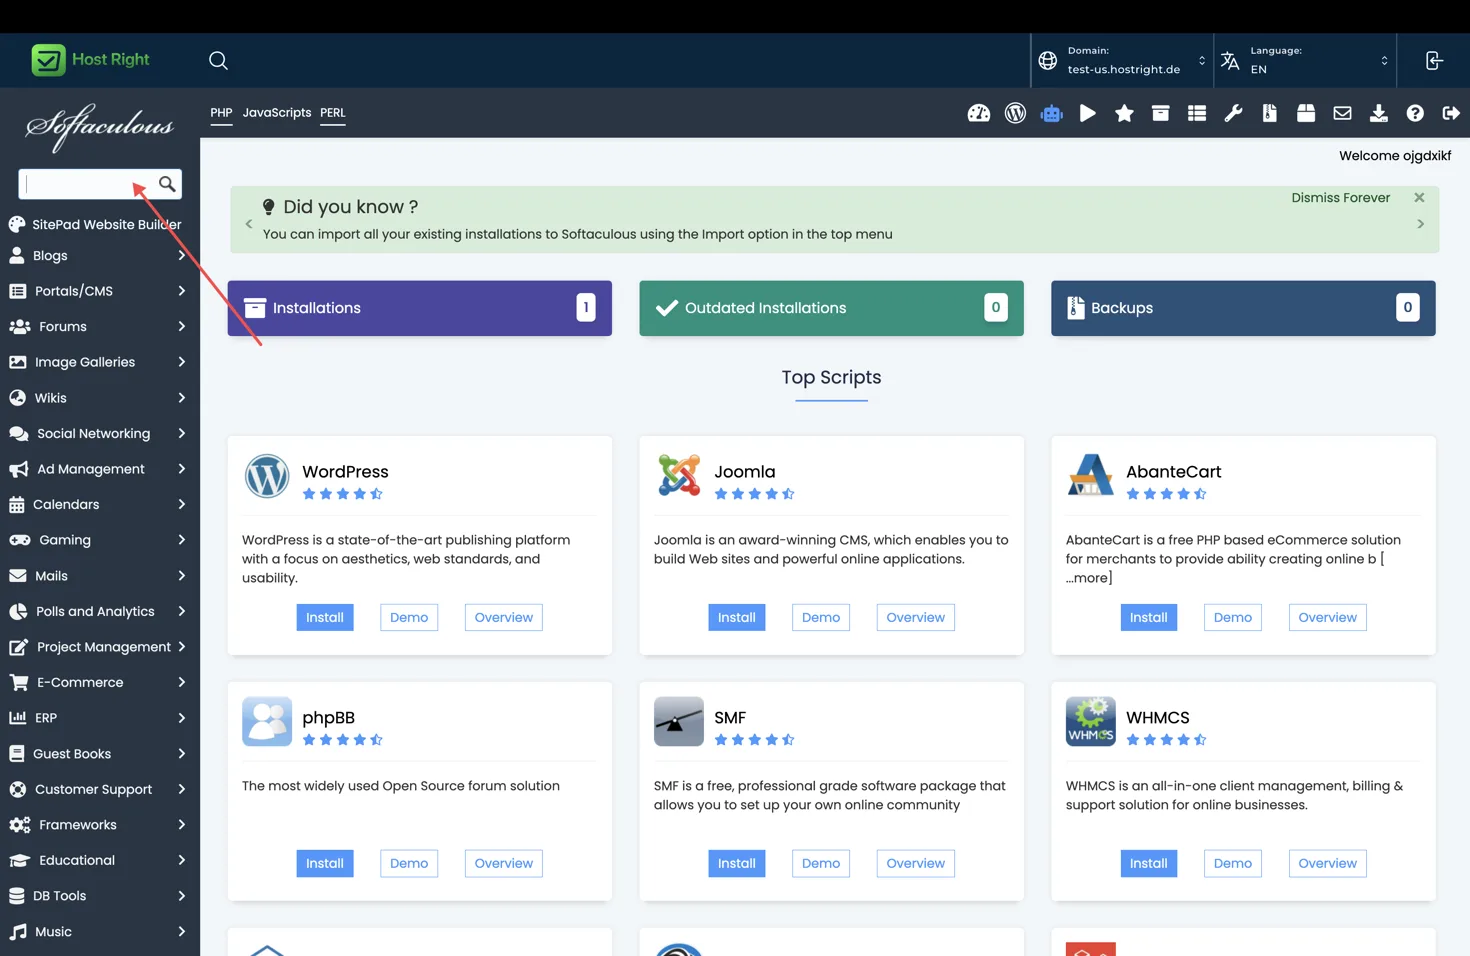
Use the search field to find the application, open its overview, and select Install.
Install with Softaculous
Open Extra Features > Softaculous Auto Installer, search for Wallabag, open the application overview and select Install. Choose HTTPS, your domain and an optional directory, then create the administrator account and review the generated database settings.
Wait for the installation to complete, save the displayed access URL and credentials, and sign in to configure the reading experience, email delivery and user settings.
Database, files, Redis and SSL
Use database management for the application database and SFTP for file transfers. Redis is optional for cache or sessions when supported by the installed version. Enable it in the panel and follow Redis setup after this basic configuration. Enable HTTPS with SSL setup.
Keep Wallabag and extensions updated, back up before upgrades, and use one-click applications for the shared installer workflow.