
Application hosting
Deploy Django with Phusion Passenger
Run a Django application on HostRight with HostRight Control Panel, Passenger, SSH, database migrations, static files, environment variables, and safe deployments.
Django on HostRight
HostRight runs Django through the HostRight Control Panel Python application interface and Phusion Passenger. The deployment uses Django's WSGI application, not a long-running local runserver process.
Start with Deploy Python applications with HostRight Control Panel and Passenger for the shared setup.
Prepare the project
Keep the project outside public_html:
apps/example-django/
├── manage.py
├── passenger_wsgi.py
├── requirements.txt
├── project/
│   ├── settings.py
│   ├── urls.py
│   └── wsgi.py
└── staticfiles/
Use a reviewed requirements.txt and do not commit .env, database passwords, or private keys.
Transfer and create the application
Use Git for repeatable releases:
cd ~/apps
git clone git@github.com:example/example-django.git example-django
cd example-django
For later releases:
git pull --ff-only origin main
You can also use SFTP or FTP. SFTP is preferred because it is encrypted.
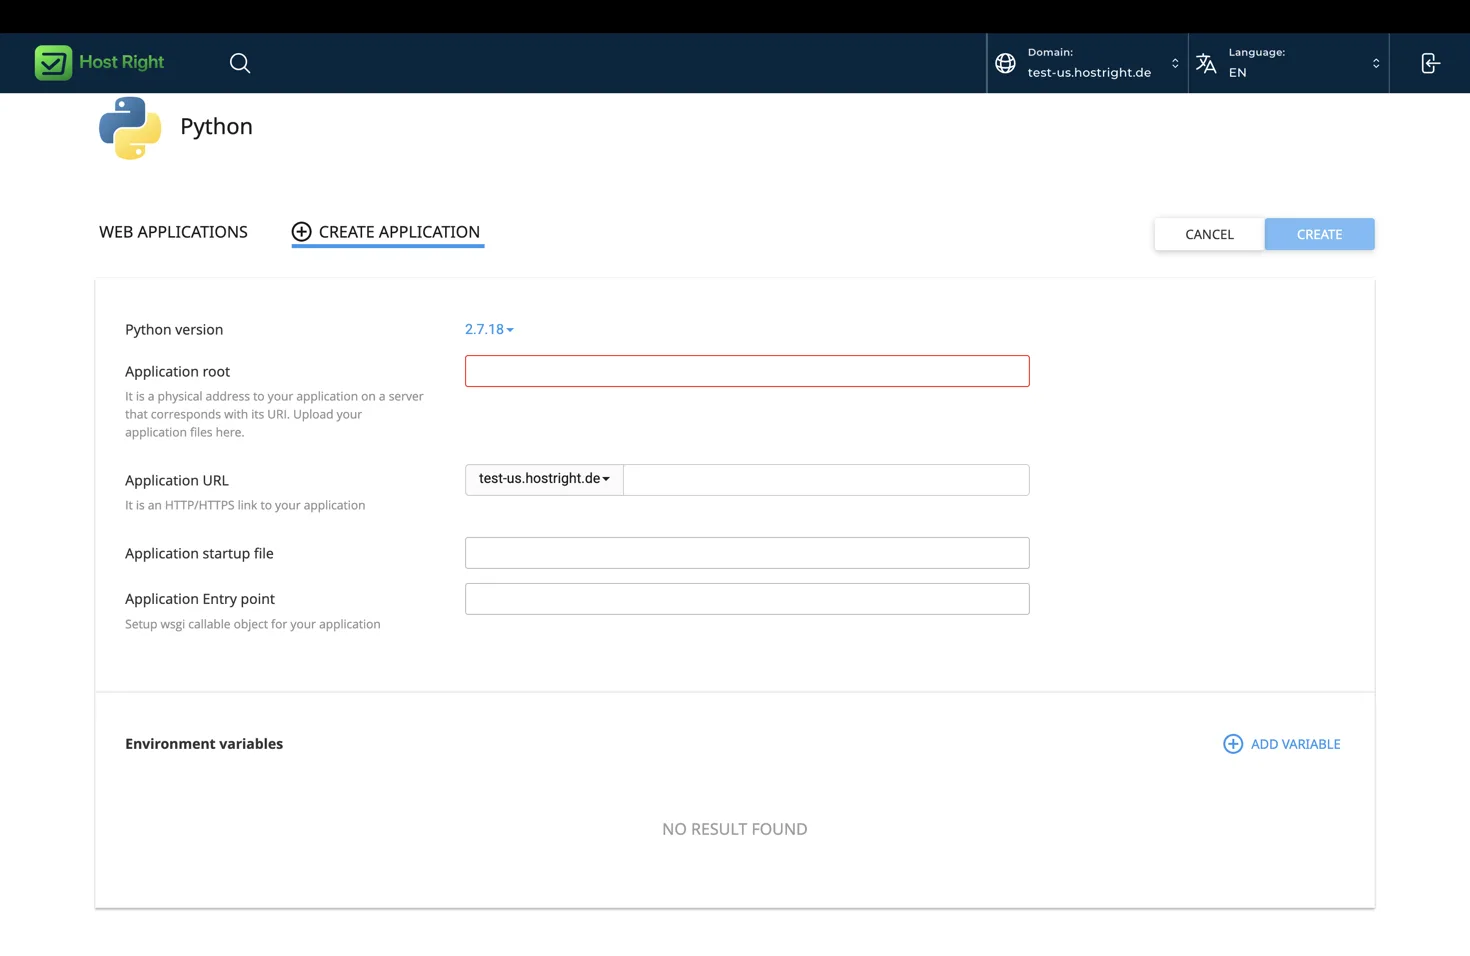
In HostRight Control Panel, open Extra Features → Setup Python App → Create Application and set:
Application root: apps/example-django
Application startup file: passenger_wsgi.py
Application entry point: application
Create passenger_wsgi.py
Replace project with the package containing settings.py and wsgi.py:
import os

os.environ.setdefault("DJANGO_SETTINGS_MODULE", "project.settings")

from project.wsgi import application
The entry point is application. Do not use Django's development server in production.
Install dependencies and configure settings
From SSH, activate the environment assigned by HostRight Control Panel. Replace the example path with the path shown for your application:
cd ~/apps/example-django
source ~/virtualenvs/example-django/bin/activate
python -m pip install -r requirements.txt
Set production values through the application environment:
DJANGO_SECRET_KEY=replace-with-a-random-secret
DJANGO_DEBUG=false
DJANGO_ALLOWED_HOSTS=example.com,www.example.com
DATABASE_URL=replace-with-your-database-connection
In settings.py, keep DEBUG off, configure allowed hosts, secure cookies, CSRF protection, database settings, email, and static files. Never put production secrets in source control.
Create the database
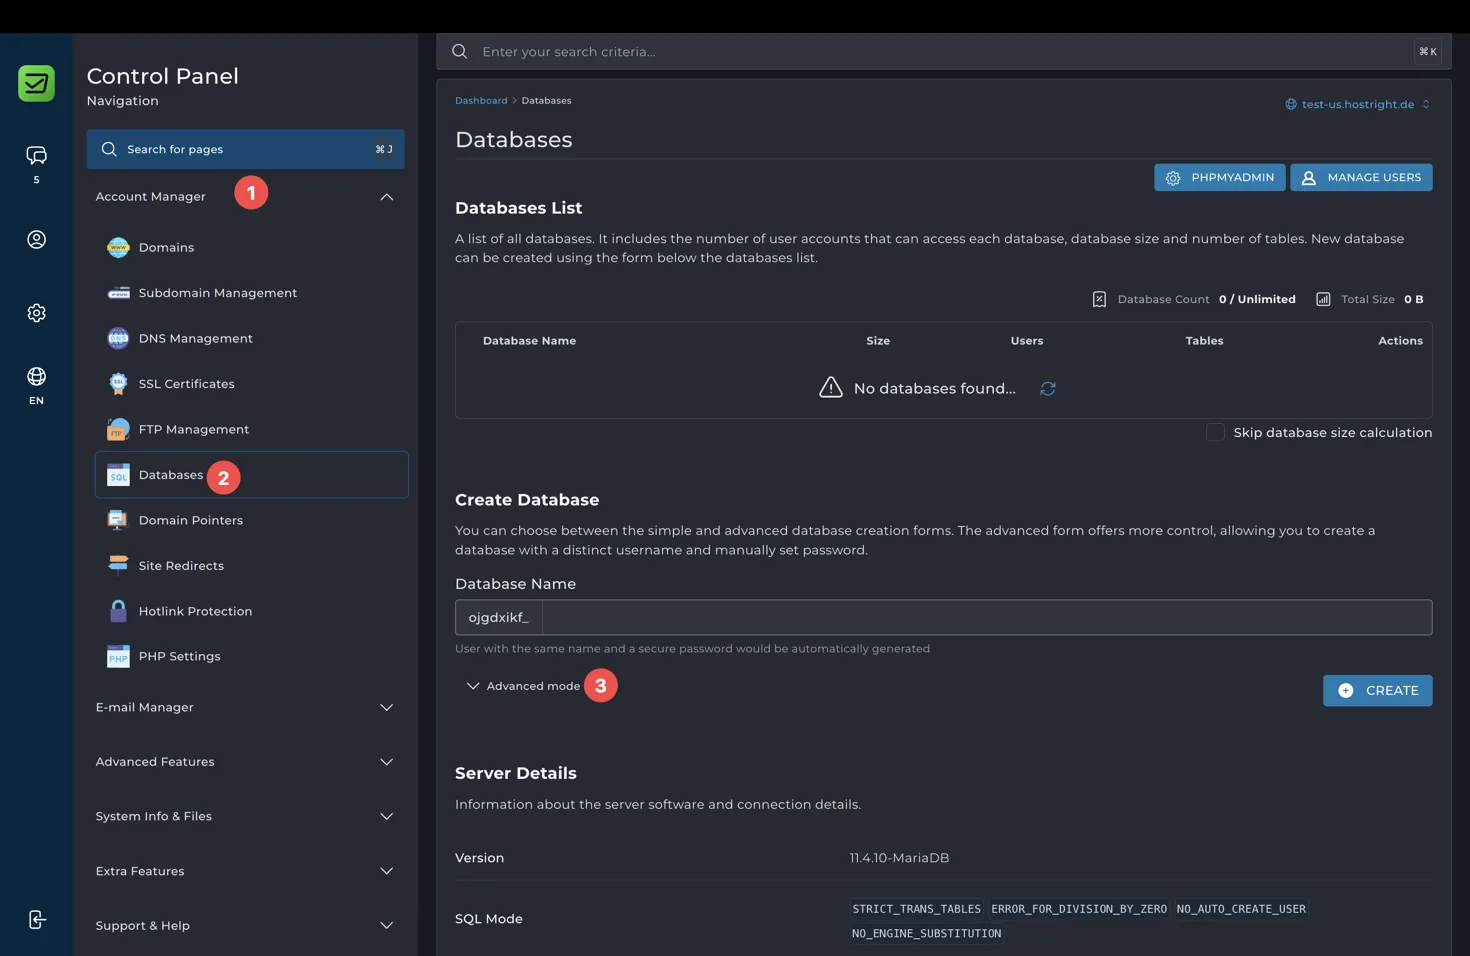
Open Account Manager → Databases in the Control Panel and create a database and user. Copy the database host, name, username, password, and port into the application environment.
Example environment values:
DATABASE_HOST=localhost
DATABASE_NAME=accountprefix_example
DATABASE_USER=accountprefix_example
DATABASE_PASSWORD=replace-with-a-strong-password
DATABASE_PORT=3306
Use the exact values shown under Server Details. Follow Create and manage a database for database users, imports, exports, and backups.
Serve Django static files through Apache
Do not rely on WhiteNoise as the default static-file strategy for this deployment. Let Apache serve collected files directly from the domain home so Passenger handles Python requests only.
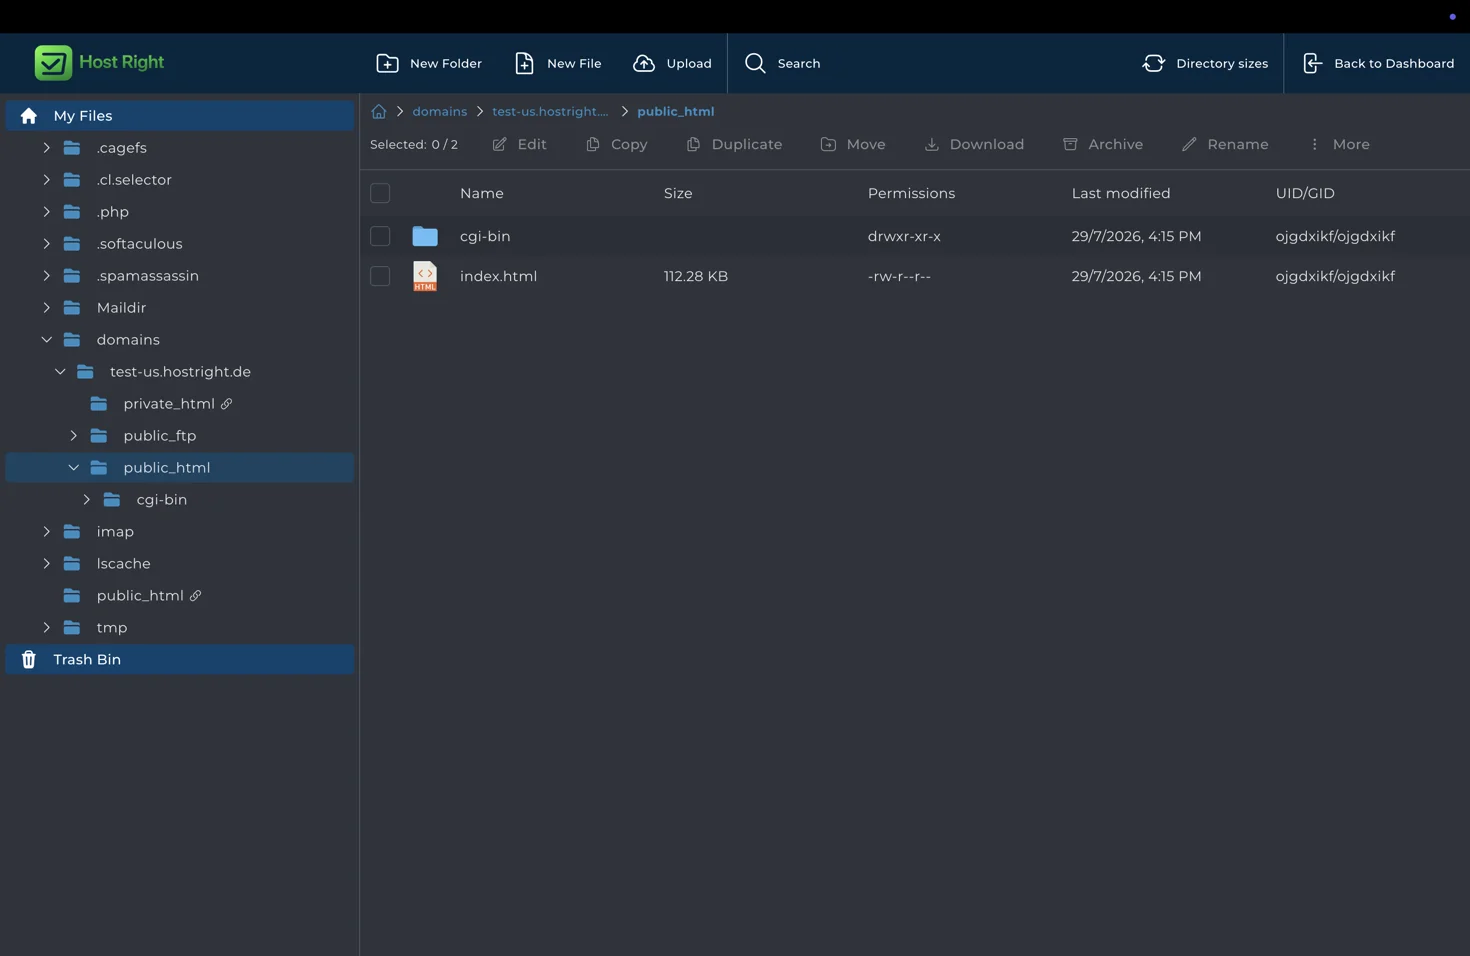
Set STATIC_ROOT to the domain's public static directory. For example, if the domain home is domains/example.com:
STATIC_URL = "/static/"
STATIC_ROOT = "/home/ACCOUNT_USERNAME/domains/example.com/public_html/static"
Use the real account username and domain path from File Manager. The public directory should then contain:
domains/example.com/public_html/
└── static/
    ├── admin/
    ├── css/
    └── js/
Run collectstatic from the private application root:
python manage.py collectstatic --noinput
Apache can now return /static/... directly from public_html/static, without sending each static request through Django and Passenger. Do not place the virtual environment, source code, .env, or uploaded private files in public_html.
Run migrations
python manage.py check --deploy
python manage.py migrate
Test the admin login, forms, uploads, email, static assets, and scheduled tasks before switching traffic.
Add Redis for cache and sessions
Enable Redis under Advanced Features → Redis, then copy the socket path shown by the Control Panel.
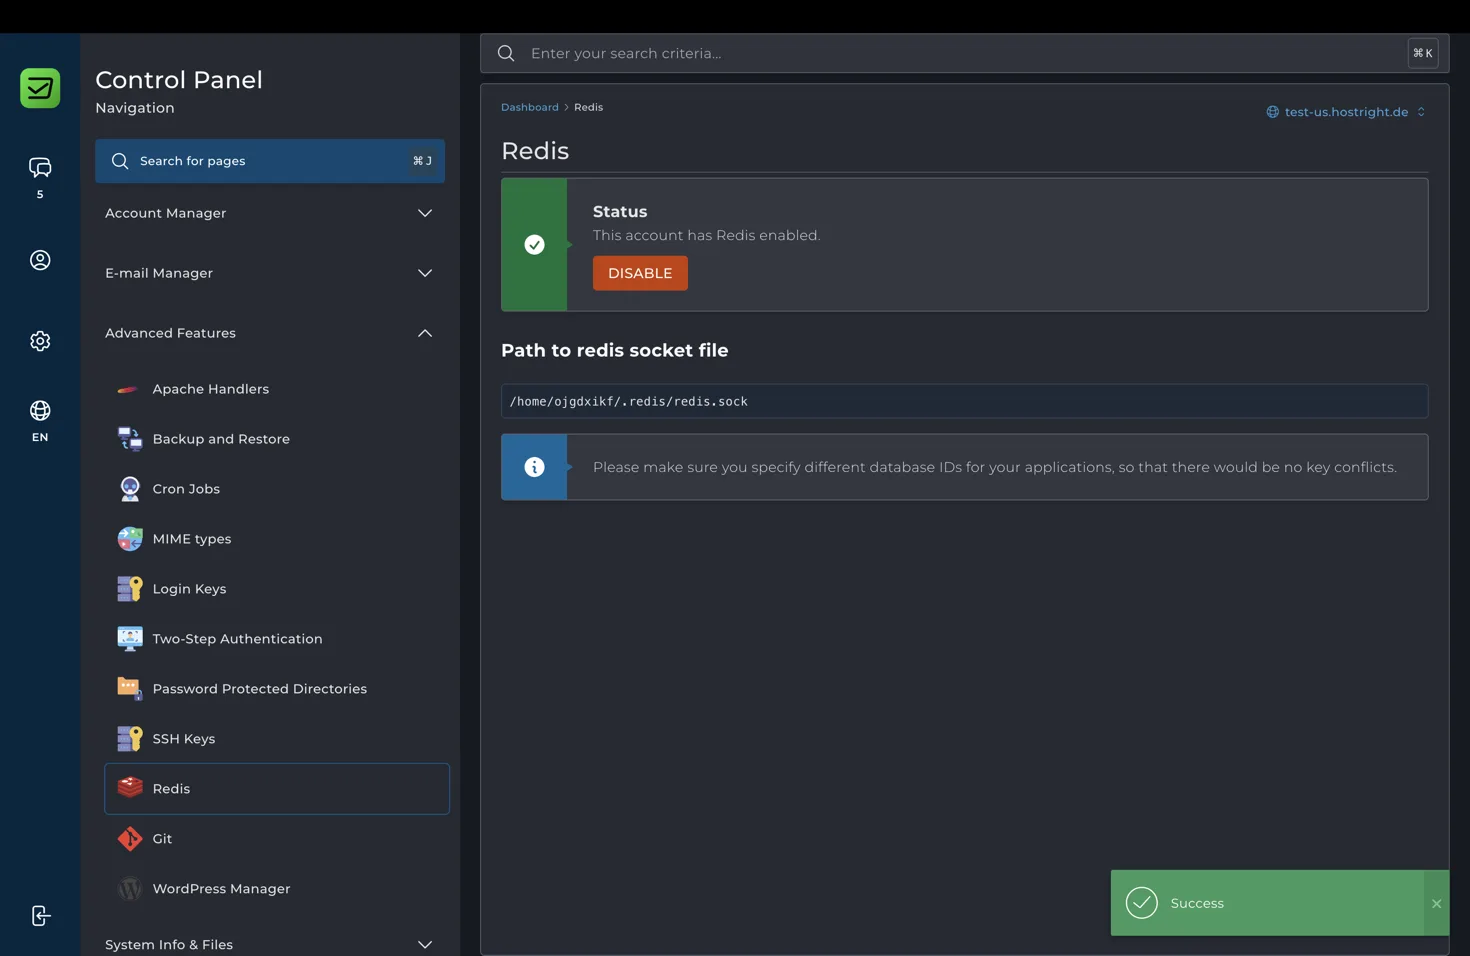
Configure Django with the Redis socket using the cache backend or Redis client supported by the project. Keep a separate Redis database ID for this application:
REDIS_SOCKET=/home/ACCOUNT_USERNAME/.redis/redis.sock
REDIS_DATABASE=1
Use Redis for cache and sessions, not as the only storage for important records. See Enable and use Redis for the exact socket setup and client notes.
Enable SSL before launch
Request the certificate under Account Manager → SSL Certificates after the domain points to HostRight. Then test the site at https://example.com and configure Django's secure cookies, CSRF origin, and HTTPS redirects for production.
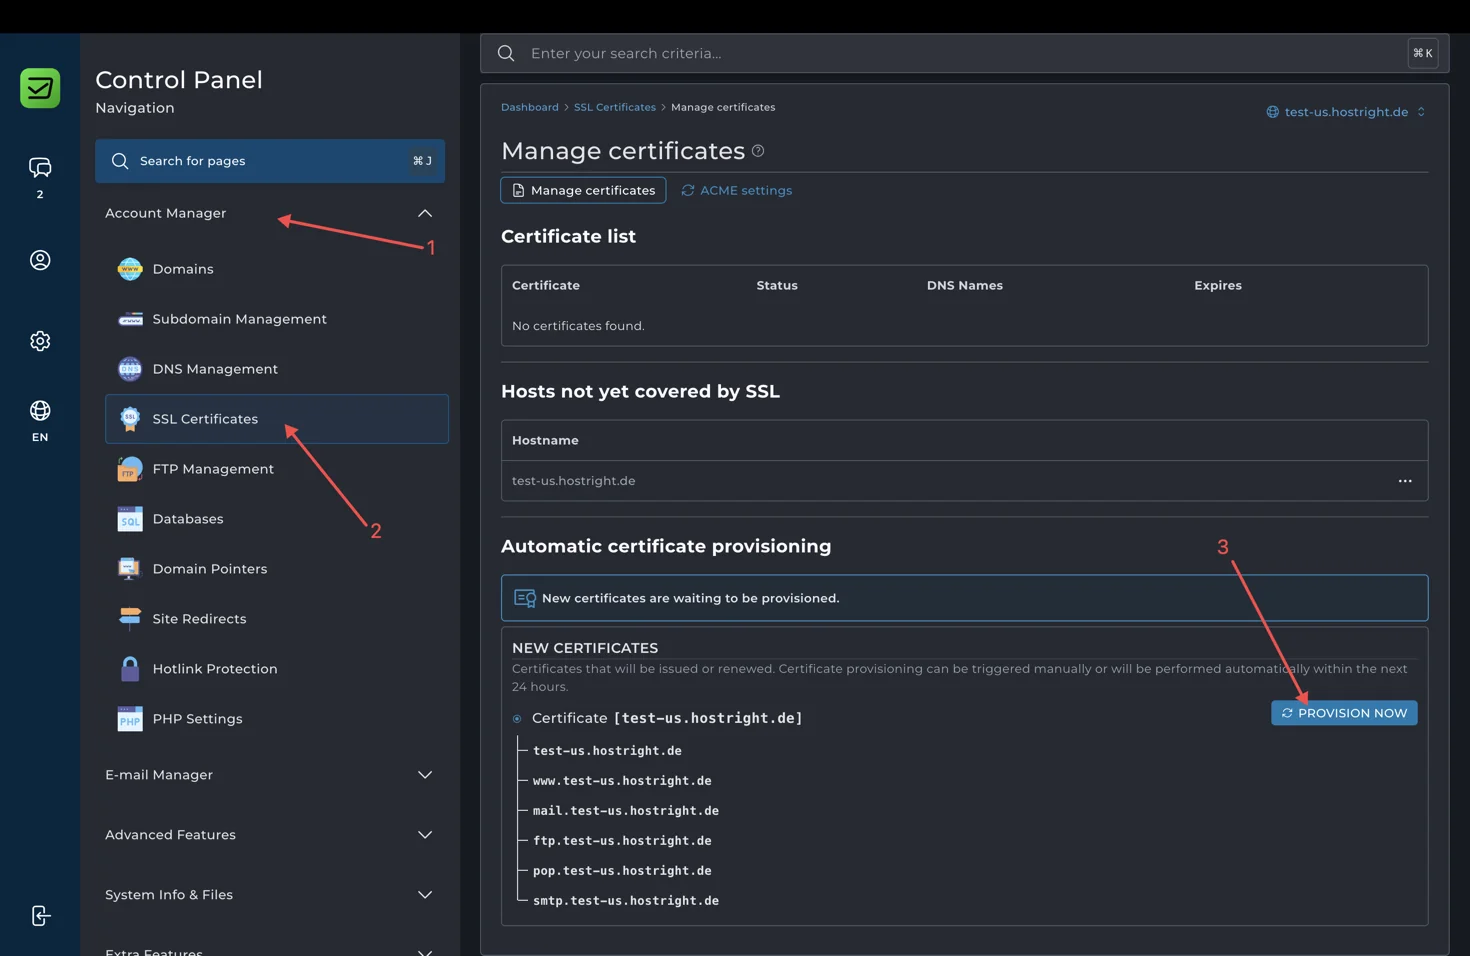
Use the SSL setup instructions if certificate validation fails.
Deploy an update
cd ~/apps/example-django
git pull --ff-only origin main
source ~/virtualenvs/example-django/bin/activate
python -m pip install -r requirements.txt
python manage.py migrate
python manage.py collectstatic --noinput
Reload the Python application in HostRight Control Panel after changing code, dependencies, environment variables, or passenger_wsgi.py. Take a backup before migrations or major package upgrades.
Troubleshooting
If Passenger cannot import Django, check the environment, package name, DJANGO_SETTINGS_MODULE, application root, and startup file. If static files fail, run collectstatic and verify the static directory. If database access fails, verify the database host, name, user, password, and port.
Use the SSH guide for terminal access and the Redis guide for cache or session configuration.