
Application hosting
Install WordPress with WordPress Manager
Install WordPress in one click from your HostRight Control Panel, then manage updates, users and database settings from one place.
Install WordPress from the Control Panel
WordPress Manager provides a guided installation for your domain. It creates the WordPress files and database for you, so you can start with a working WordPress site without a manual upload or database setup.
HostRight also provides Softaculous as an alternate WordPress installer. Use WordPress Manager when you want HostRight-specific WordPress management such as automatic core updates, user access and database configuration. Use Softaculous when you are already working in its application catalog or want the same installer workflow used for Joomla and other PHP applications.
Access Softaculous and search
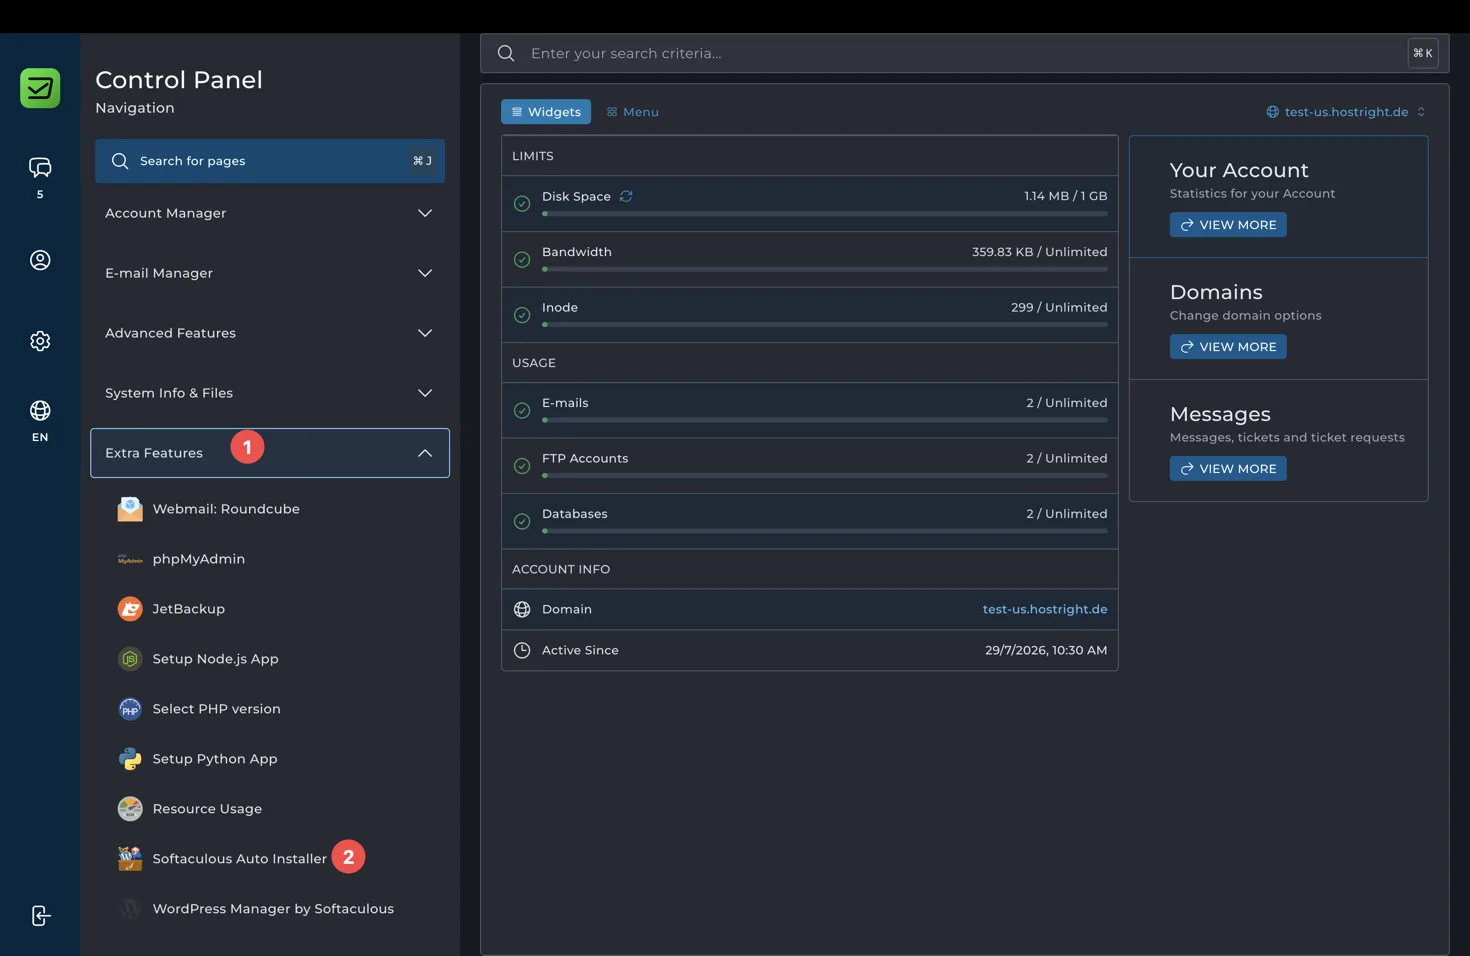
Open Extra Features in the Control Panel and select Softaculous Auto Installer.
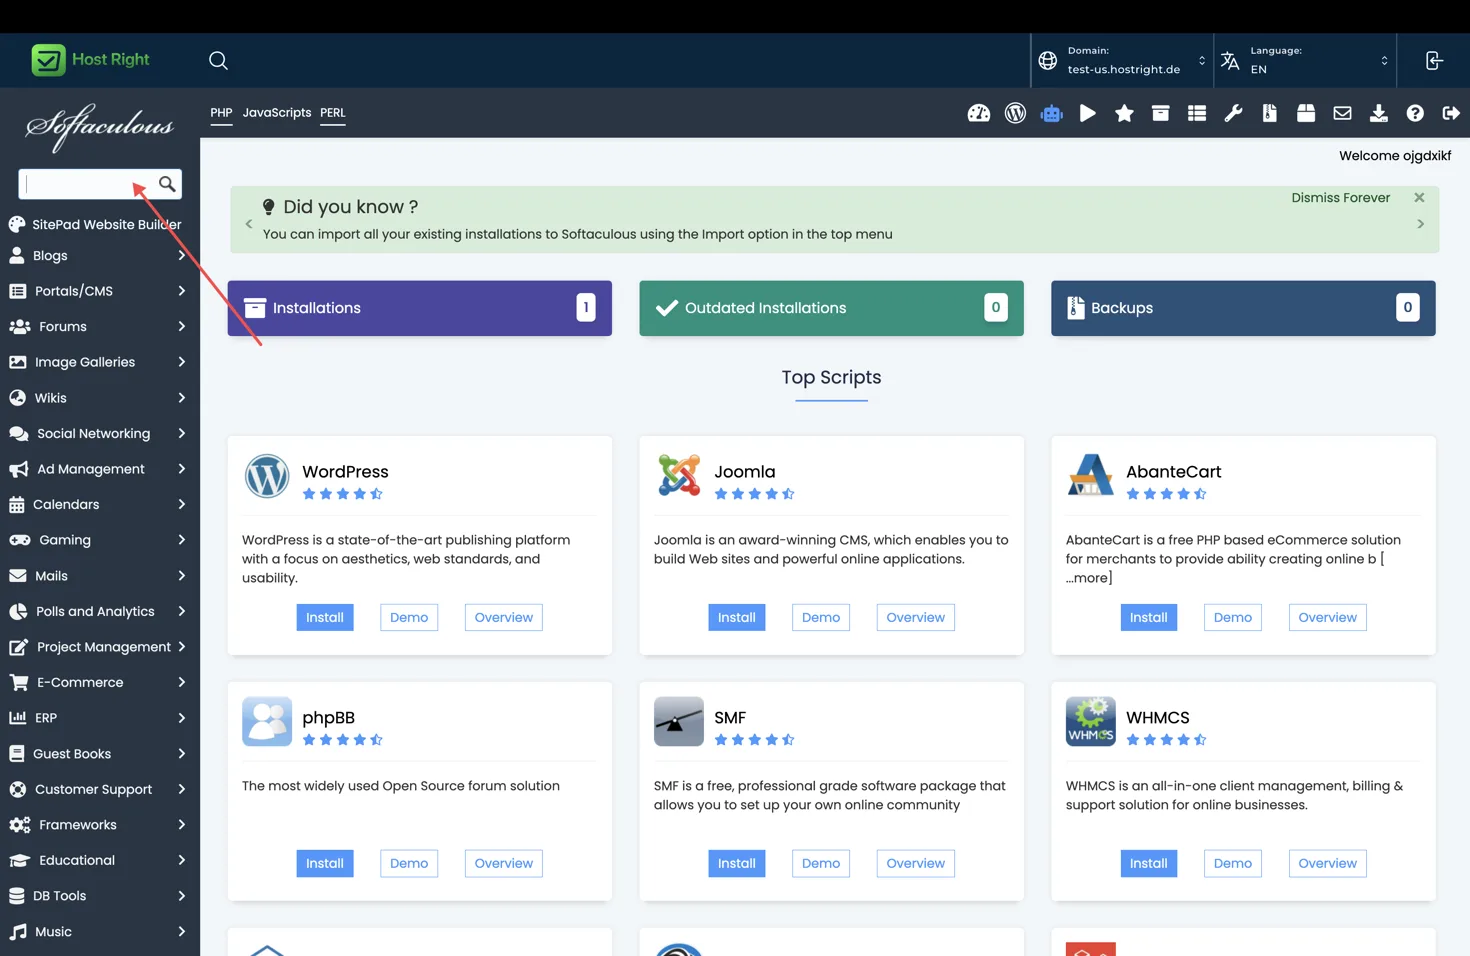
Search for WordPress, open its overview, and select Install.
1. Open WordPress Manager
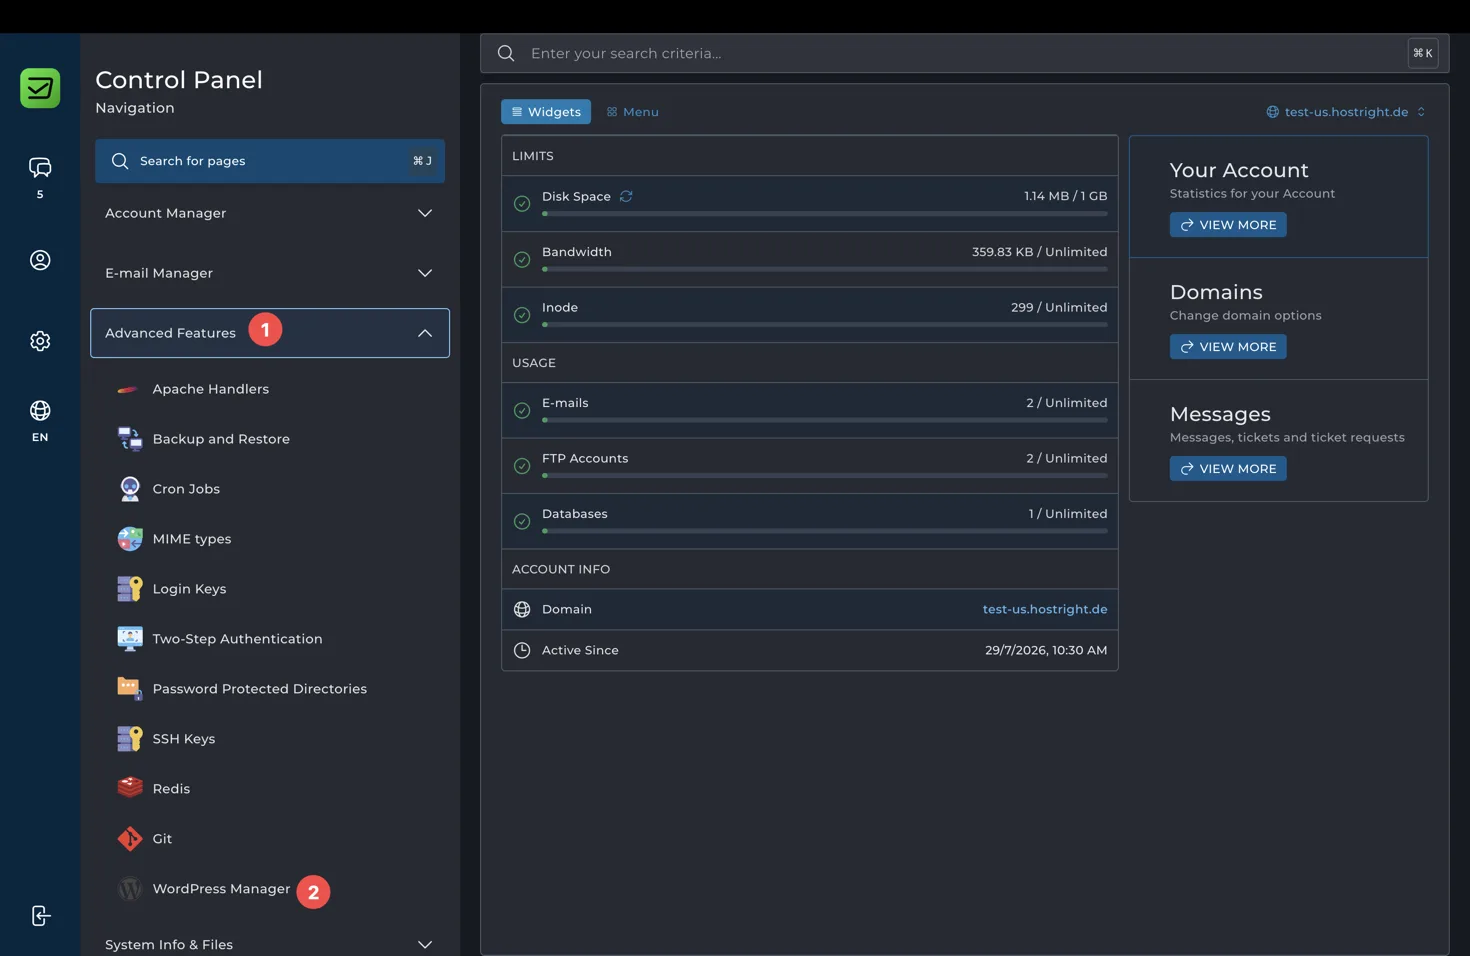
Sign in to your HostRight Control Panel and expand Advanced Features. Select WordPress Manager.
2. Select the domain
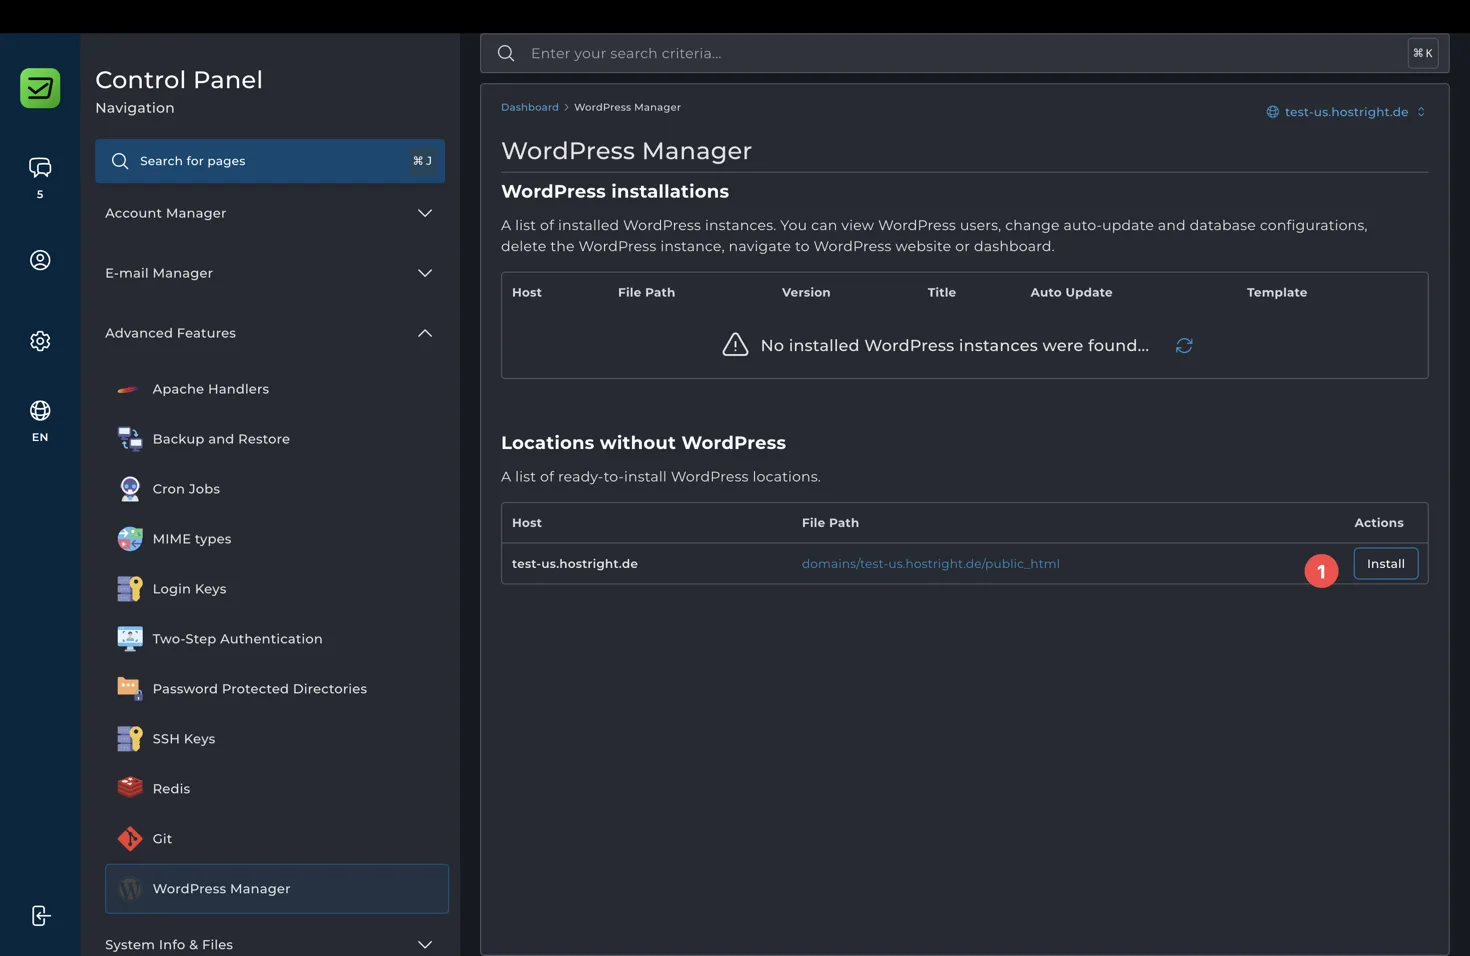
Under Locations without WordPress, find the domain where you want to install WordPress and click Install.
3. Enter the installation details
Complete the installation form:
- Directory: Confirm the directory where WordPress will be installed. The default directory installs WordPress at the domain’s document root.
- Title: Enter the name of your website.
- Admin Email: Enter an address for WordPress login and notifications.
- Admin Account Name: Choose the username for the WordPress administrator account.
- Admin Password: Create a strong password, or use the password generator.
For Database, leave Create new selected unless you have an existing database prepared for this site. Expand Advanced mode if you need to customize the database or other installation options, then select Create.
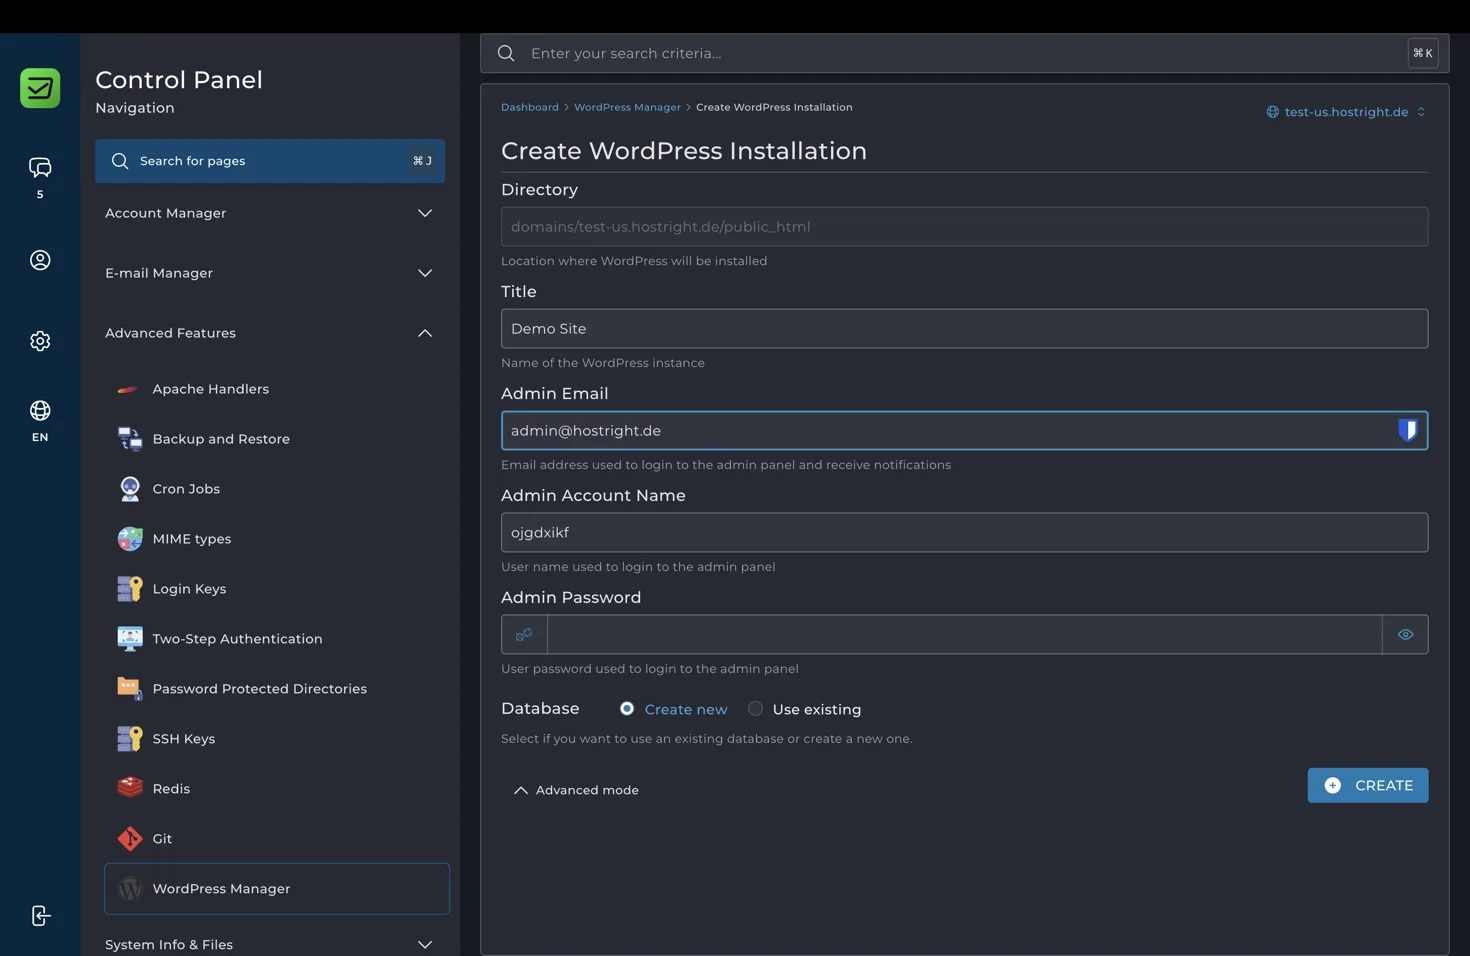
4. Save the login details
After the installation completes, WordPress Manager shows the login URL, admin email, account name and password details. Store these details securely before continuing.
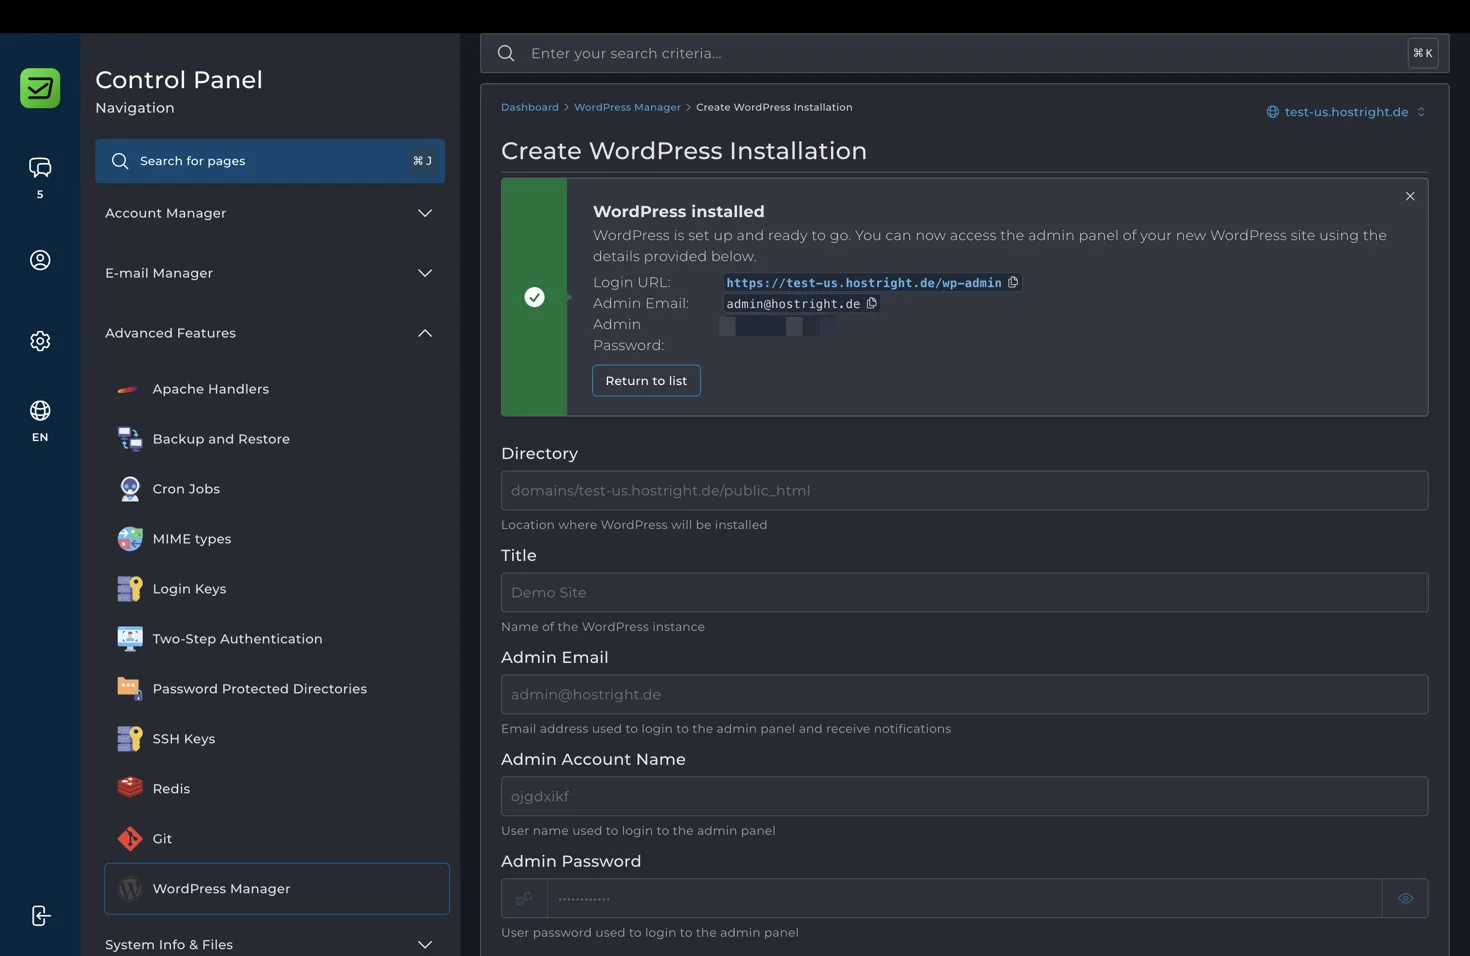
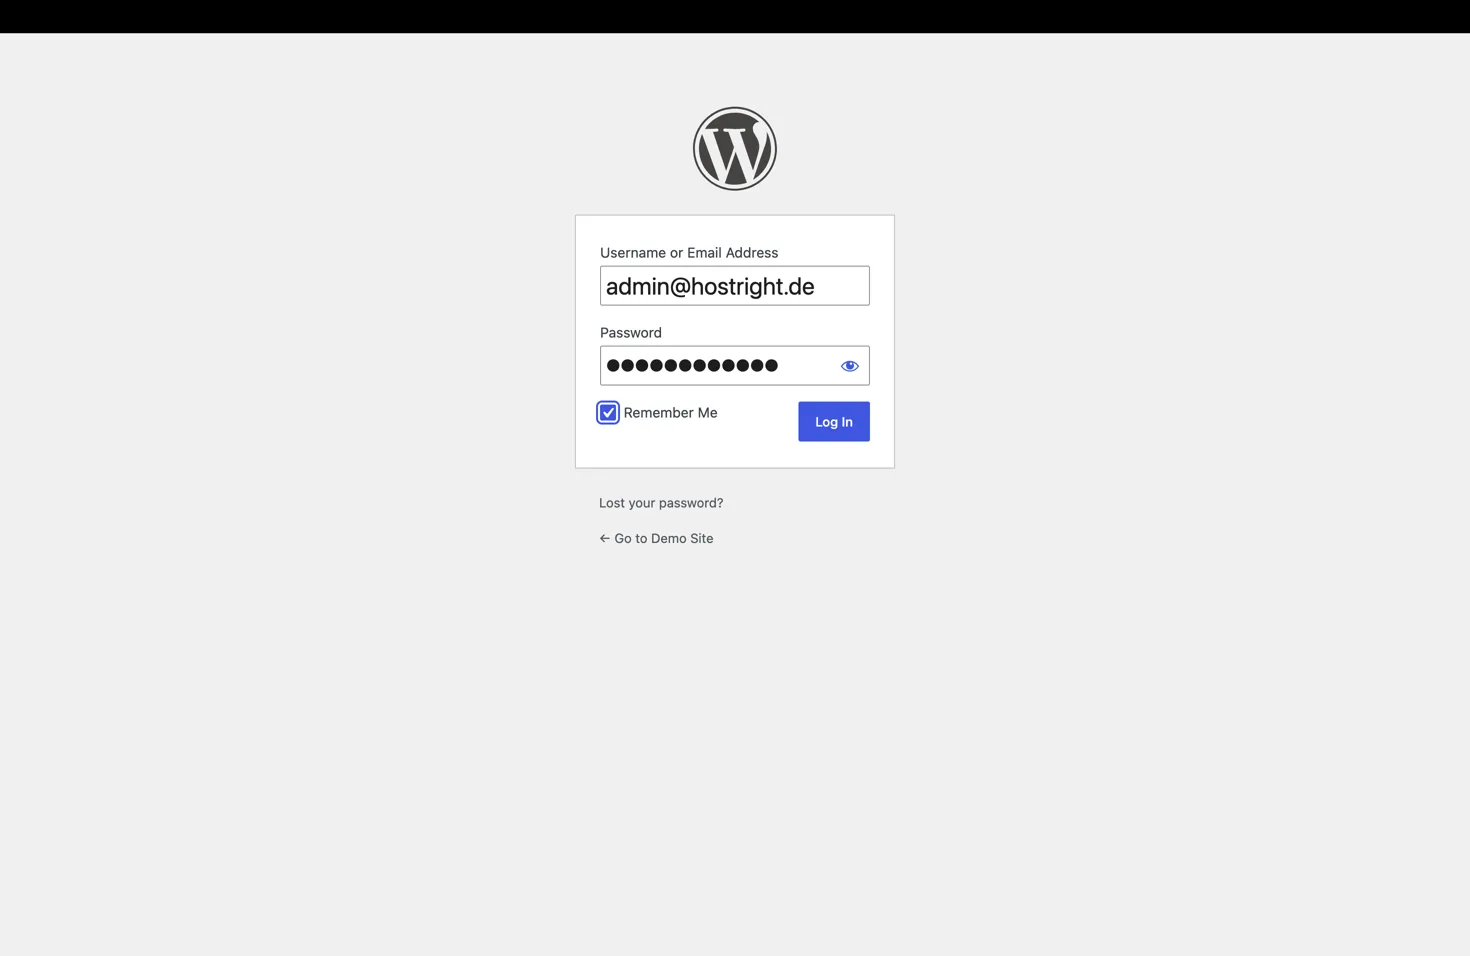
5. Sign in to WordPress
Open the displayed Login URL, usually your domain followed by /wp-admin. Enter the administrator email or username and the password you created during installation, then click Log In.
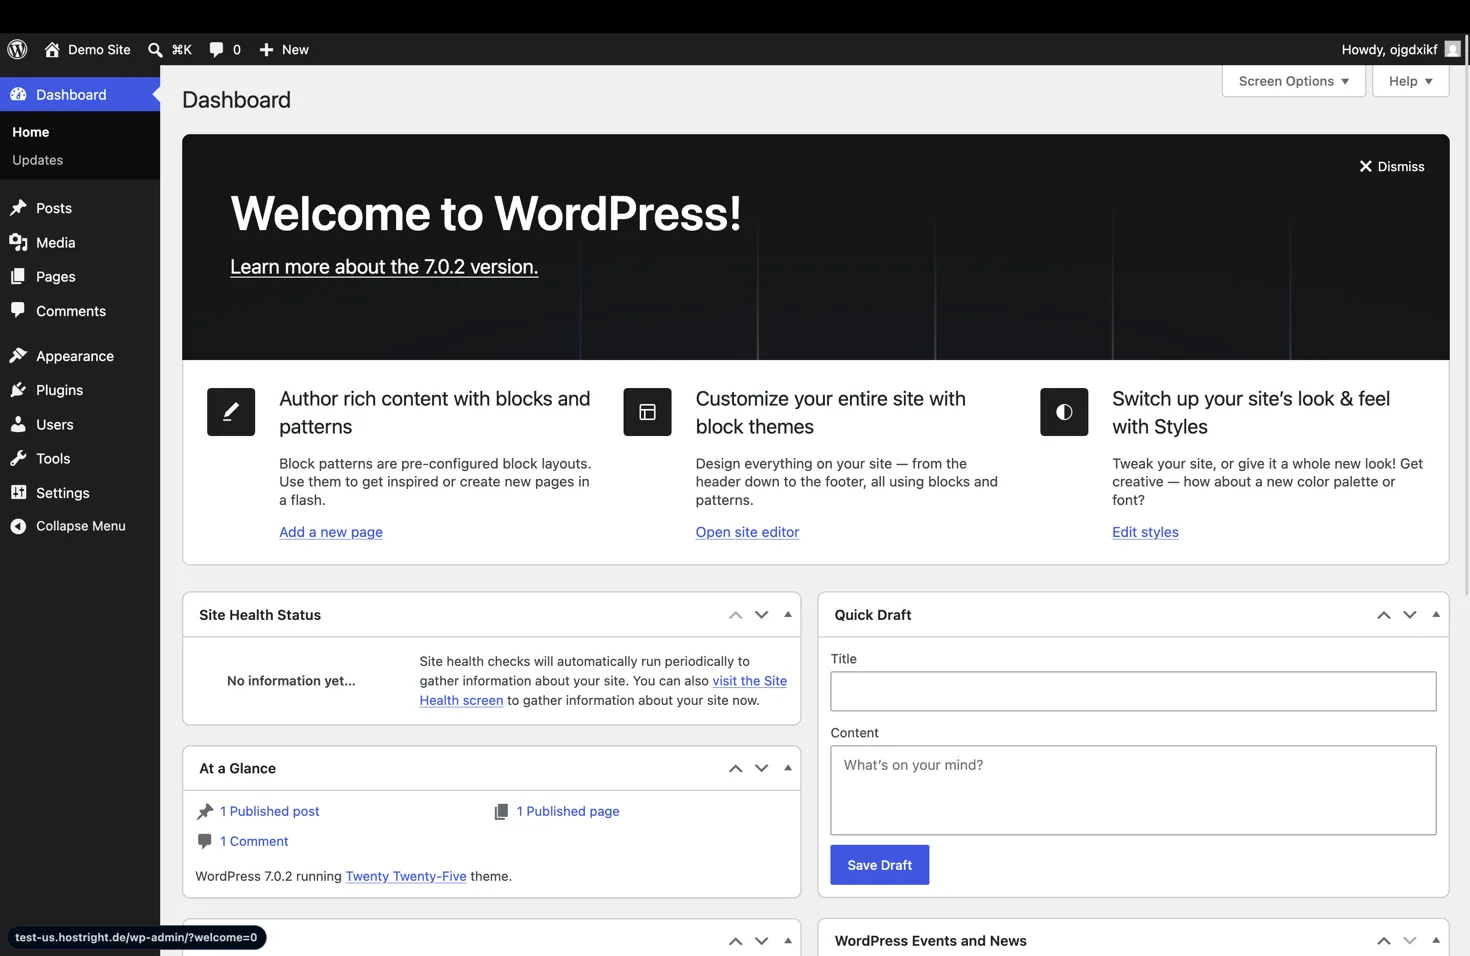
You are now in the WordPress dashboard, where you can create pages and posts, choose a theme and install plugins.
Manage WordPress from WordPress Manager
Return to Advanced Features → WordPress Manager to manage the installation without opening the WordPress dashboard. Select the actions menu (…) for the installation to view the available options.
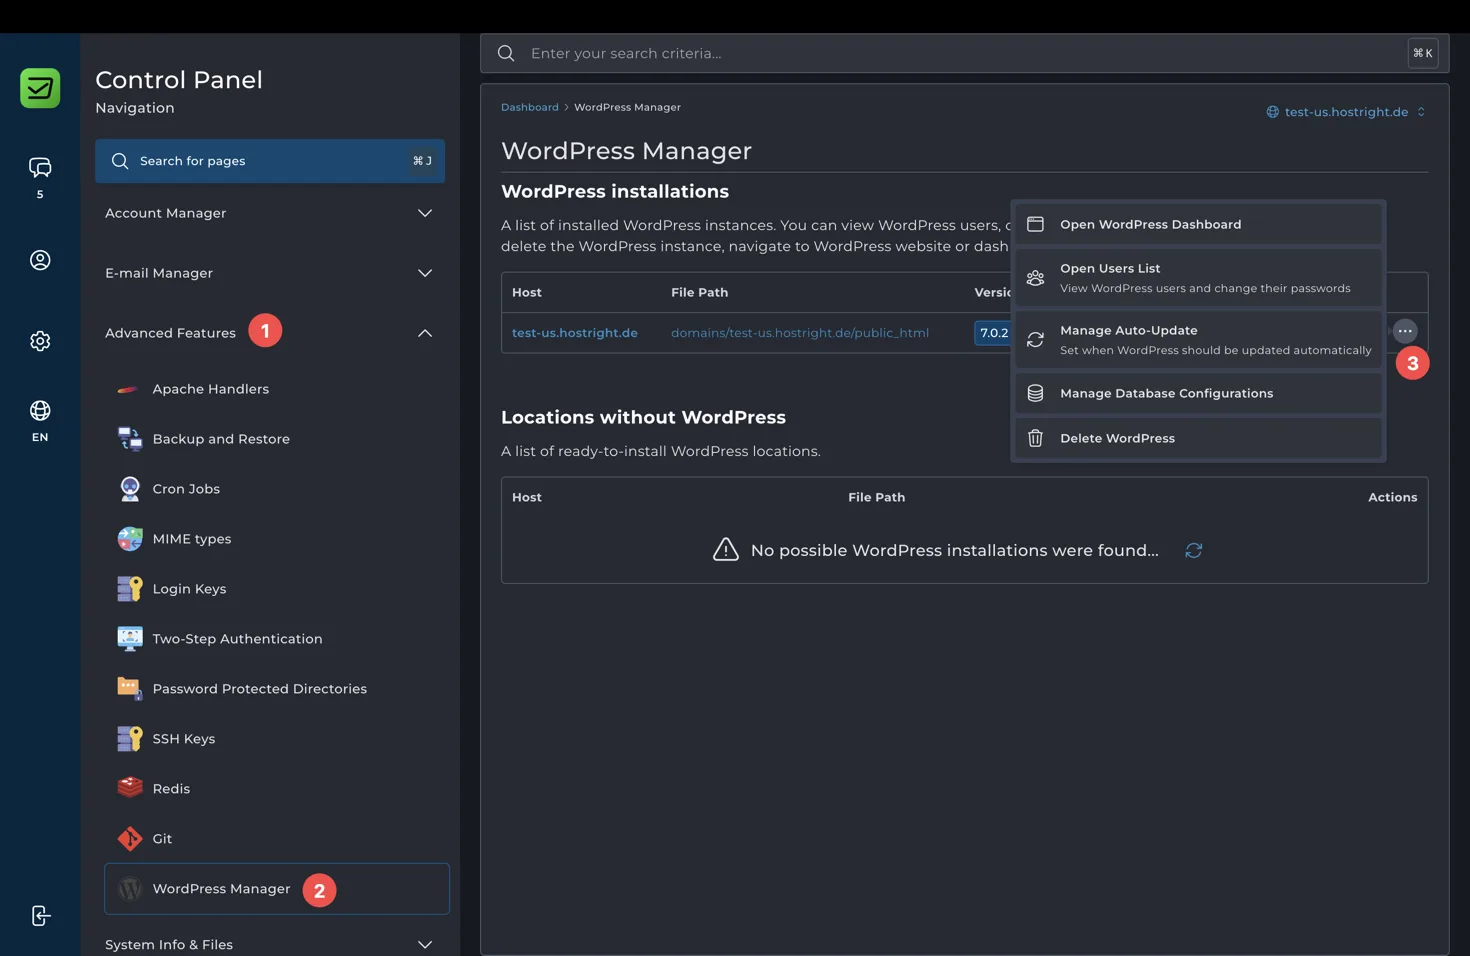
Configure automatic updates
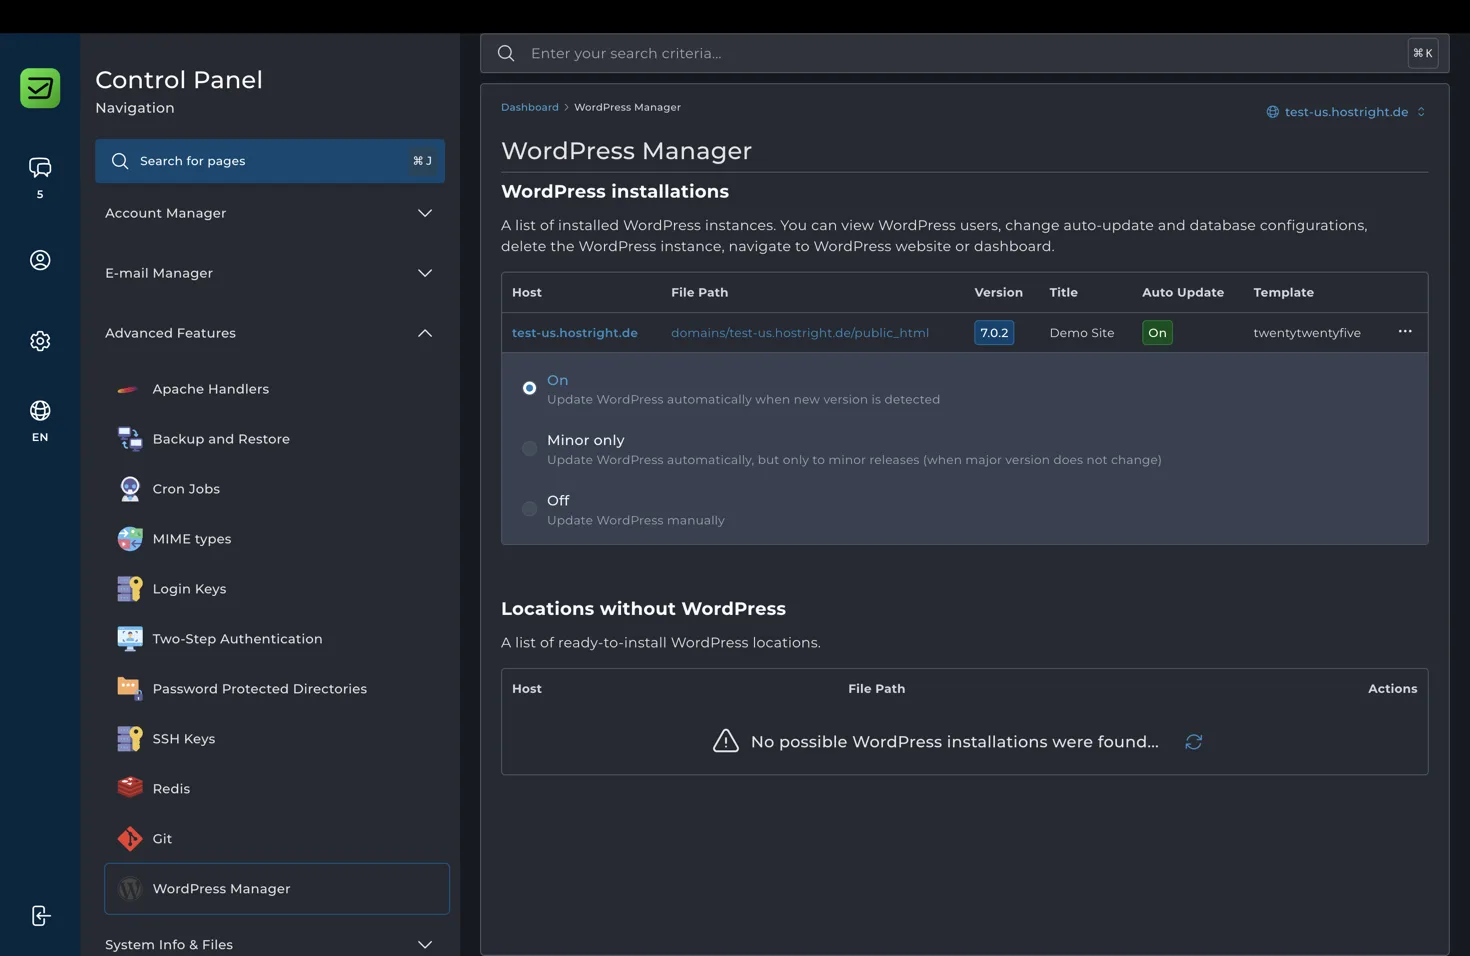
Choose Manage Auto-Update to control how WordPress is updated:
- On: Install new WordPress releases automatically.
- Minor only: Install minor releases automatically while leaving major releases for manual review.
- Off: Update WordPress manually.
Select the option that fits your maintenance workflow. Automatic updates help keep the site current, while the minor-only option gives you more control over major changes.
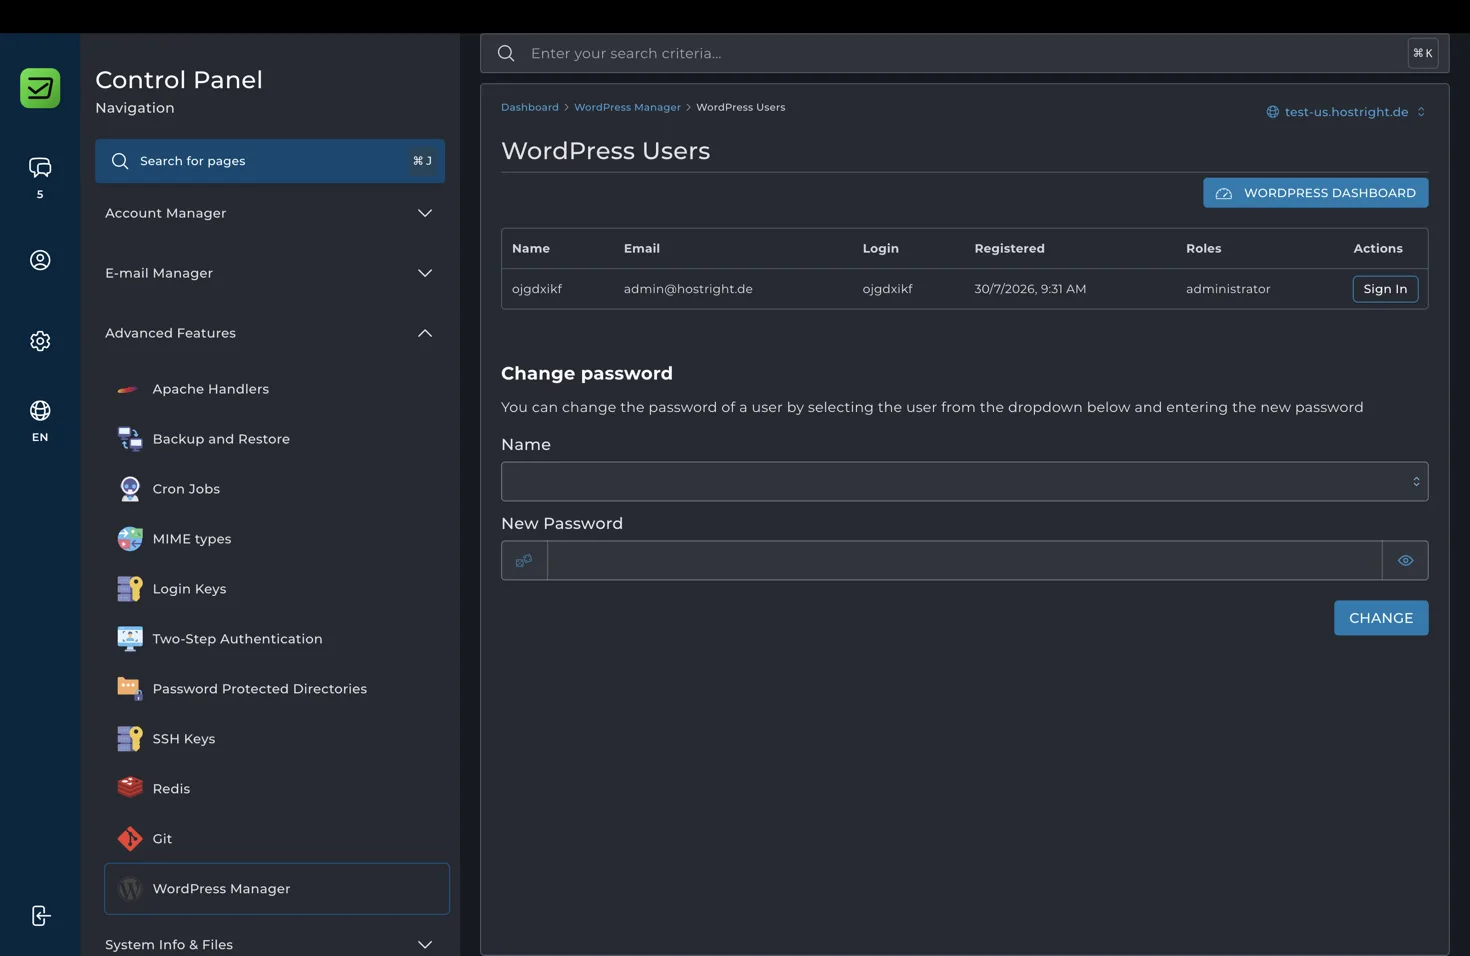
Manage WordPress users
Select Open Users List from the installation actions. WordPress Manager lists the users for the installation and lets you change a user’s password. Use Sign In to open the WordPress dashboard as a user when that option is available.
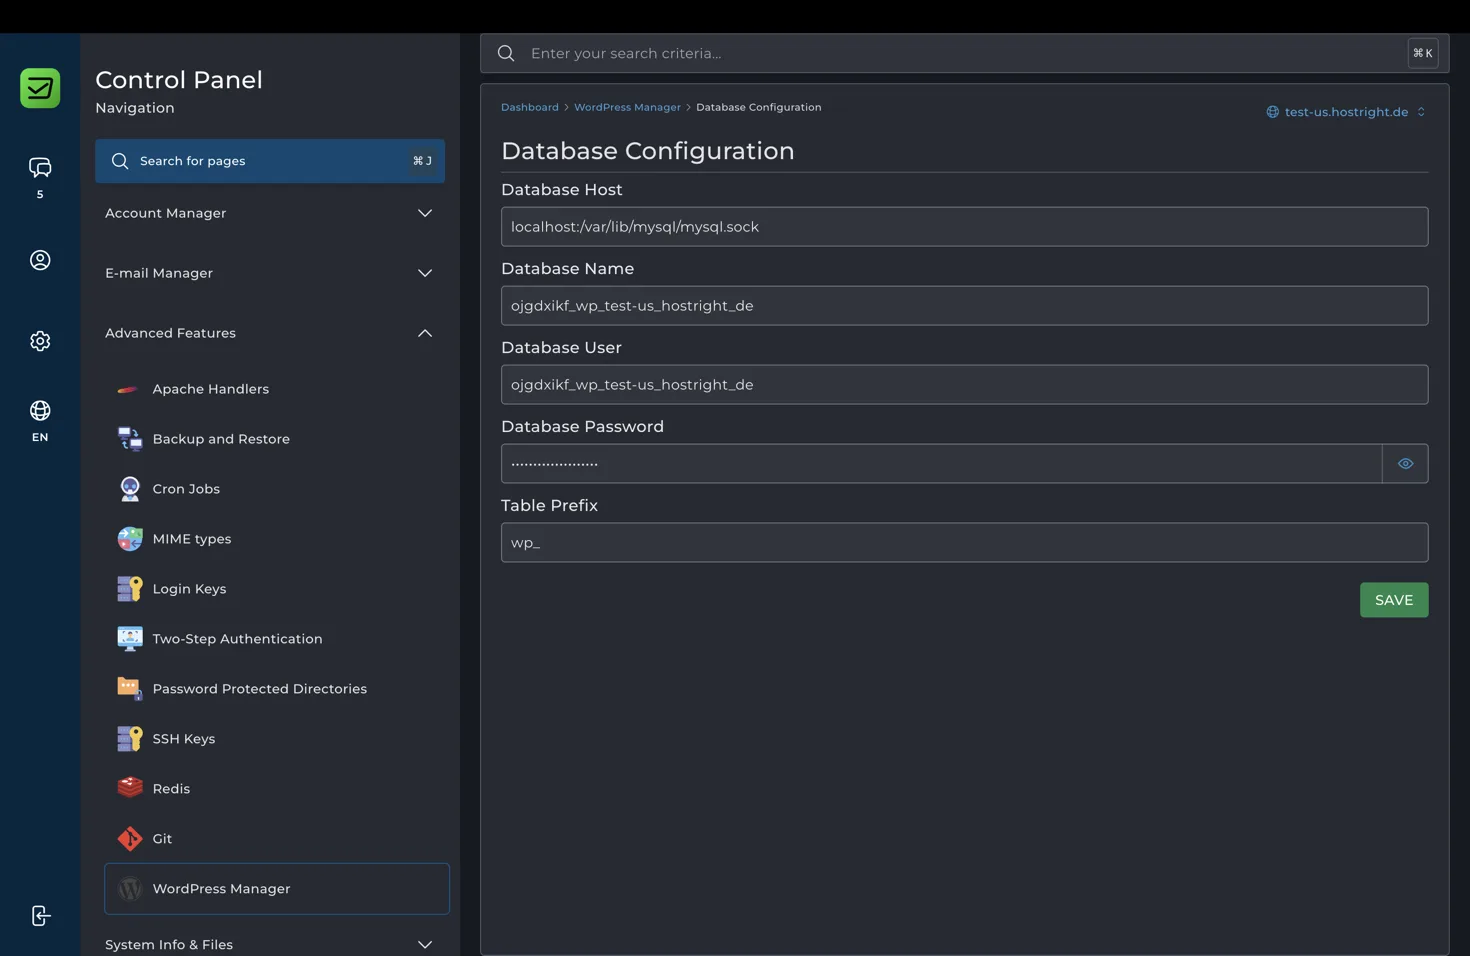
Manage the database configuration
Select Manage Database Configurations to review the connection settings for the WordPress installation, including the database host, name, user, password and table prefix. Select Save after making a change.
Only change these values when you know the matching database credentials. Incorrect settings can make the WordPress site unavailable.
The same actions menu also provides shortcuts to open the WordPress dashboard and to delete the WordPress installation. Treat deletion as permanent and take a backup first if you may need the site later.
Alternate installation with Softaculous
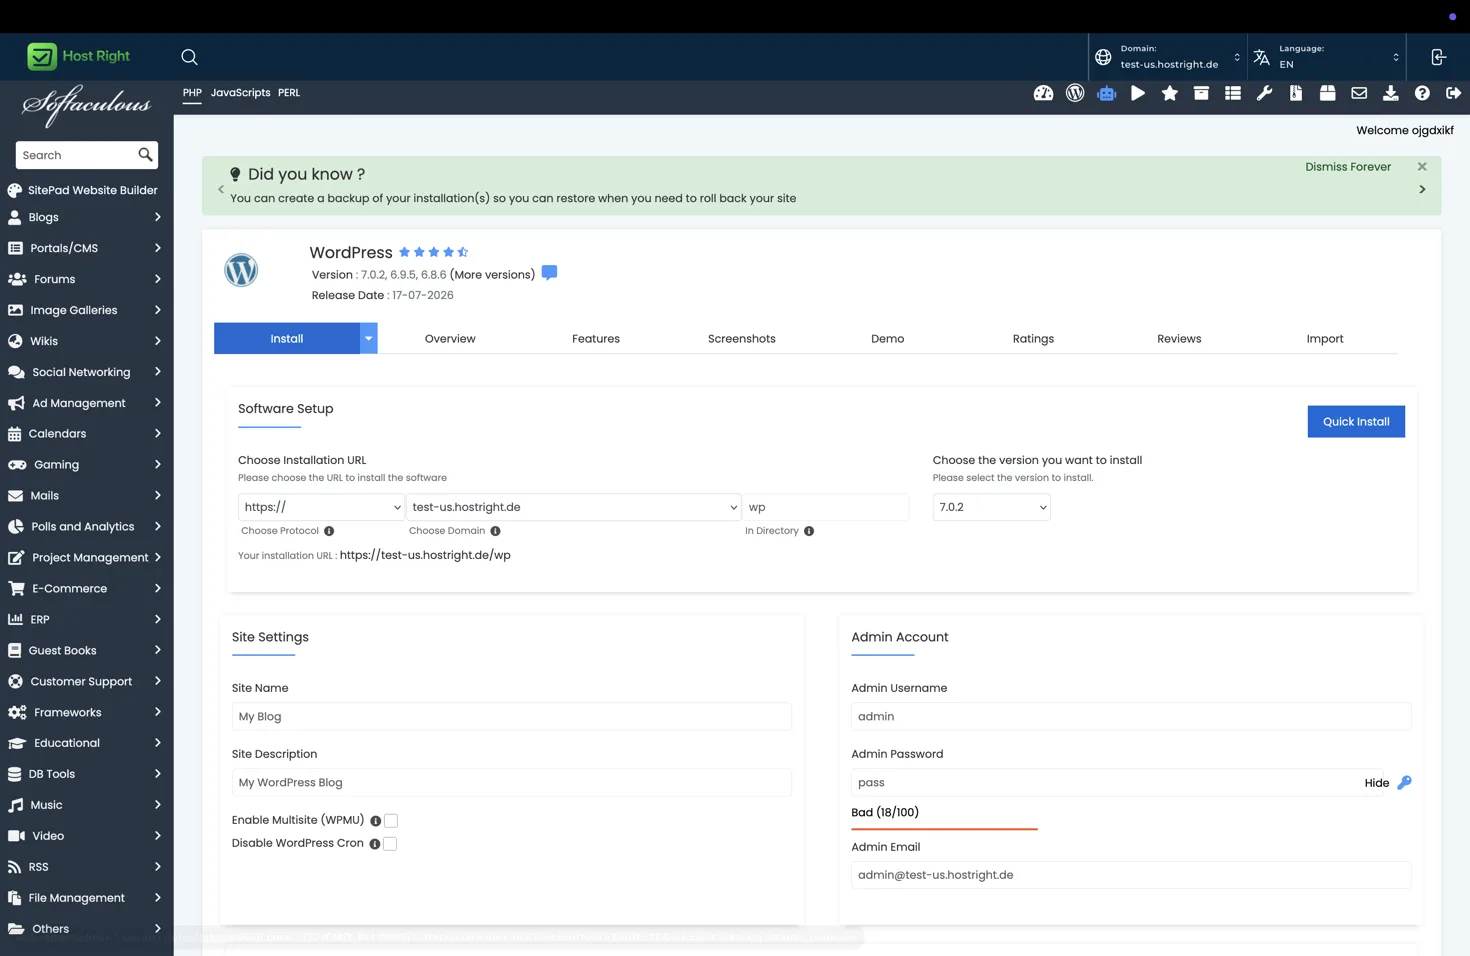
Open Extra Features > Softaculous Auto Installer, search for WordPress, open its overview and select Install.
Choose the protocol, domain and optional directory. Complete the site name, description, administrator username, strong password and email. Review the database name and table prefix, then choose the update and backup options that match your maintenance plan.
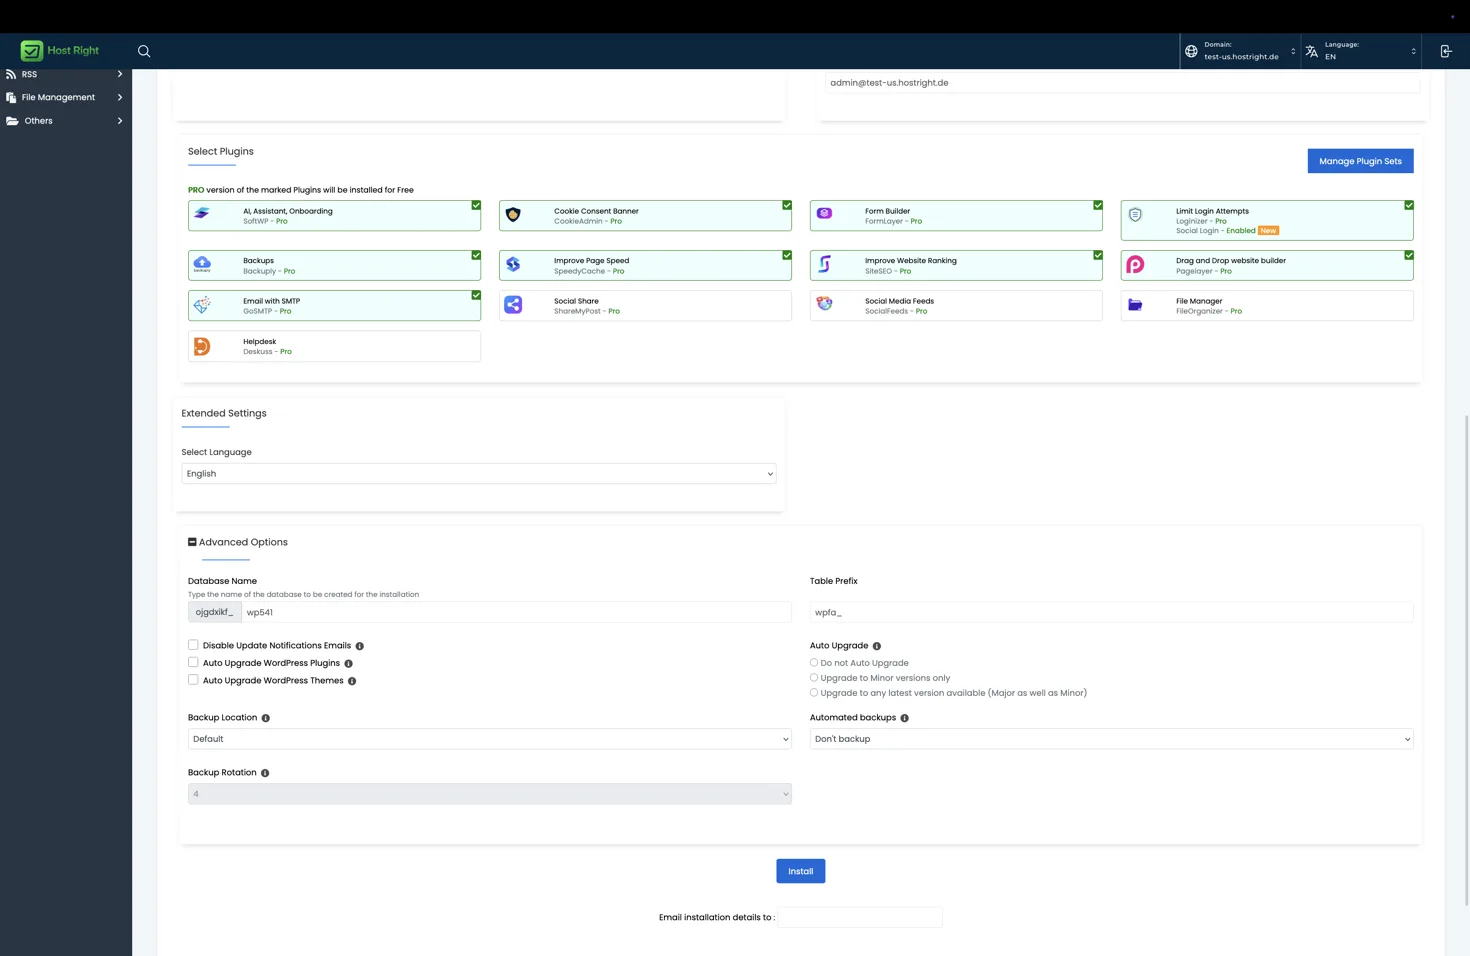
Review advanced options before selecting Install. These can include plugin sets, automatic updates, backup location and backup rotation.
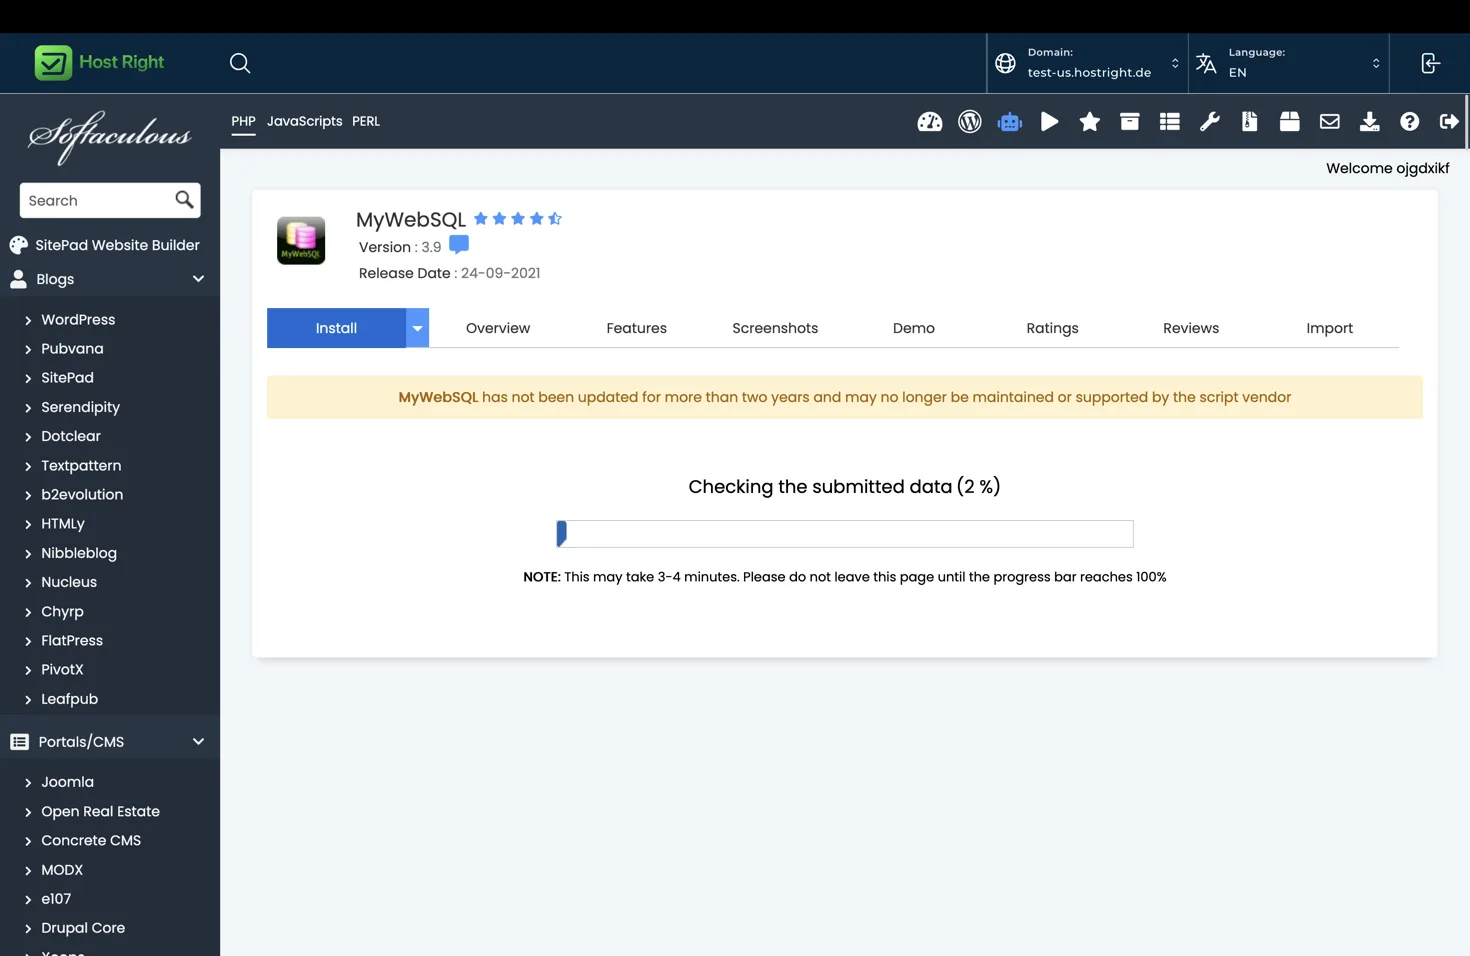
Softaculous may display a progress screen while the files and database are created. Save the administrator URL and credentials shown after the installation completes.
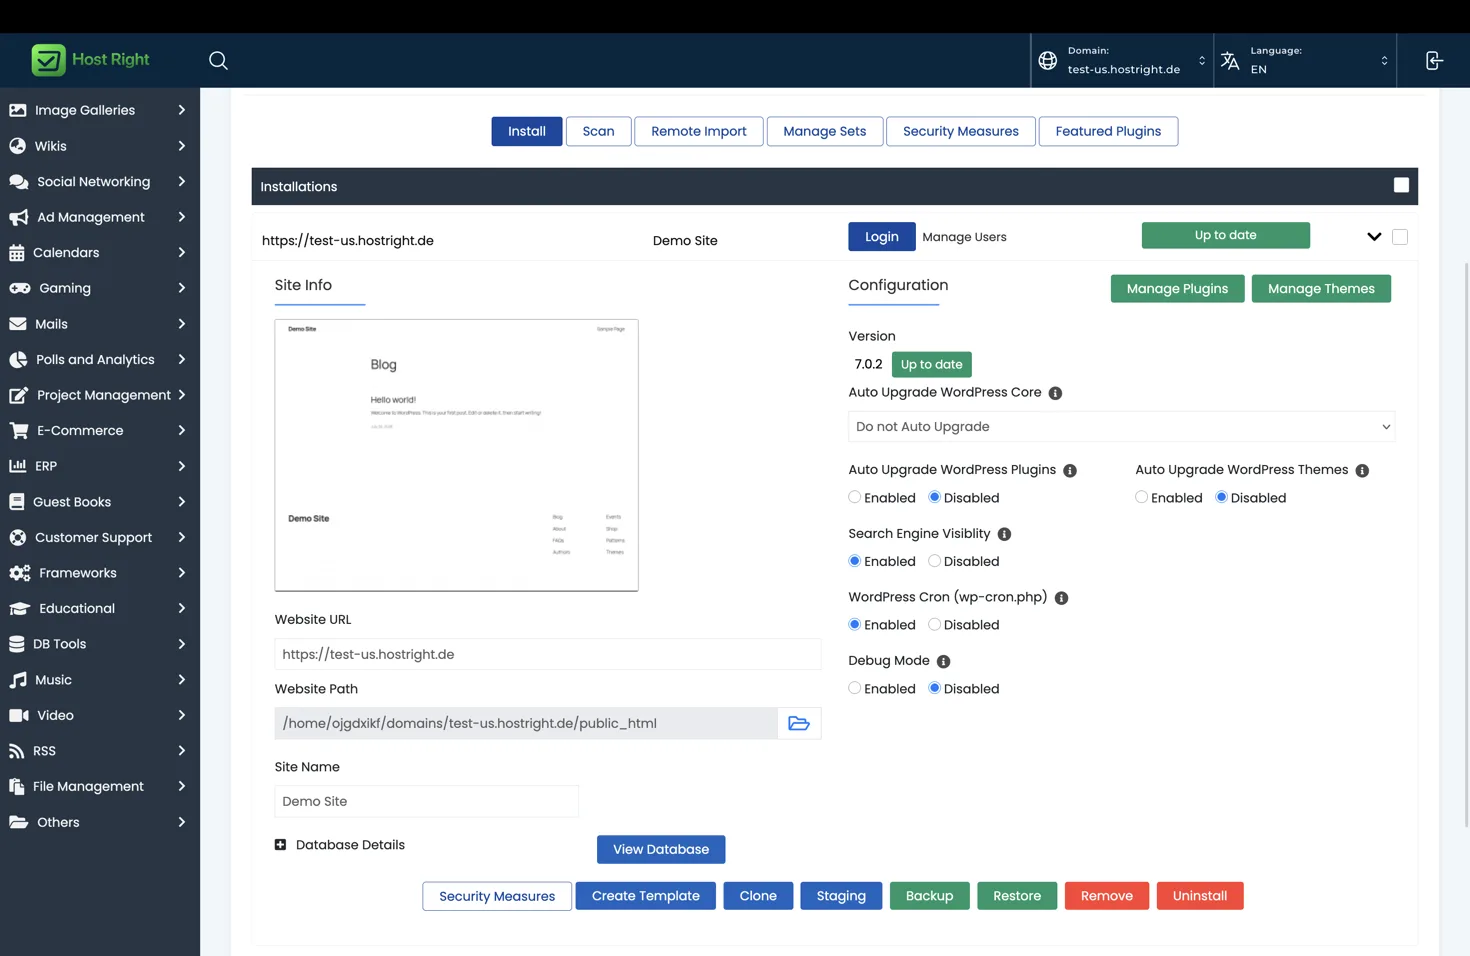
After installation, Softaculous can show the site in its installation list with actions such as Login, Manage Users, Backup, Restore and Remove.
Softaculous is an alternate installer and manager. Do not run overlapping automatic update systems without deciding which tool owns WordPress core, plugins and themes. If you installed with Softaculous, you can still use the WordPress dashboard and, where supported, WordPress Manager to manage the detected installation.